Power is an essential element of climbing performance. One could argue (and many have) it is the most critical physical aspect of climbing performance. As Tony Yaniro famously said, “if you have no power, there is nothing to endure”. If you cannot execute the hardest individual moves on your goal route, everything else is moot. It’s certainly true that every performance-oriented climber can benefit from improved power.
Last year, I discussed at length how to use a Campus Board to improve power. While highly-effective at developing pure power, Campus Training is only moderately specific to climbing. Bouldering can provide ultra-specific and effective power training, provided it is done “properly”.
Bouldering can be great fun, and that can present a problem for climbers-in-training. The casual nature of the activity makes it easy to get side-tracked on problems that are unique and challenging, but perhaps not ideal for facilitating improvement. As discussed here power training must be extremely intense and brief to be effective. Many boulder problems have far too many moves to provide effective power training. The challenge of such problems is not in executing a single powerful move, but in linking several moderately-difficult-yet-pumpy moves. This is Power Endurance training at its finest–it has its place, just not in your Power Phase!
This is where Limit Bouldering comes in. Limit Bouldering is climbing short boulder problems that feature one or two realistic moves right at the climber’s physical limit. Effective Limit Boulder problems are characterized by:
- One or Two crux moves
- Dynamic cruxes (such as a long move to latch a small edge, where core tension is required to keep your feet on small footholds)
- Cruxes close to the ground, so pump and fear are not factors
Above I hinted at the other major pitfall of bouldering, when I wrote that Limit Bouldering should feature realistic moves. It is well-known that training must be “specific” to be effective. That is, if you are training for a route whose crux involves half-pad crimps up a 10-degree overhang, you would be best served training on half-pad crimps, and Limit Bouldering on a 10-degree overhang (if you climb routes in North America, it is quite rare that you ever climb anything steeper than 30-degrees overhanging, even at crags like the Red, Maple, and Rifle).
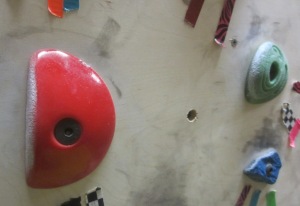
However, many indoor bouldering venues devote only a tiny fraction of their terrain to walls that overhang 30-degrees or less. Instead they favor terrain that is just plain too steep to be realistic. Steep terrain is really fun, and everyone wants to be the hero swinging monkey-like across the horizontal roof. There is no doubt such problems are enjoyable, and many are quite challenging; it’s easy to see why they are so popular. The problem is, in order for us mortals to climb these too-steep features, we require enormous holds that are too big to properly stress the finger flexors (instead emphasizing shoulder, upper arm, and back strength).

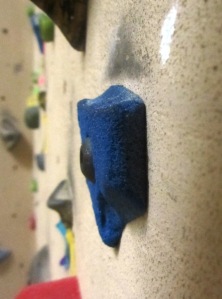
Holds like this are skin-friendly, fun to climb on, and minimize the risk of finger injury. Unfortunately they don’t exist in the real world, so they offer little training value.
This situation would be dire enough, but often the lack of realism is further compounded by exotic hold shapes (massive volumes, slopers, jugs, and other protruding features that are easily pinched). The third strike comes in the shape of relatively enormous, incut footholds that encourage huge moves and minimal core tension. Put these factors together and the result is a smorgasbord of problems that are a whole of fun to climb but provide little training benefit to actual rock climbers. Hard rock climbing in America is about pulling on small edges and pockets, while standing on tiny footholds on near-vertical terrain. The ability to campus from one lightbulb-shaped protrusion to the next has no relevance.

The North American sector of the Real World is mostly covered in small edges and pockets. Train accordingly! Fred Gomez crimping up the Hueco classic Baby Face, V7
Fortunately these bouldering pitfalls are easily avoided. To maximize the specificity of your Limit Bouldering terrain, set or select problems that include these elements:
- Realistic steepness (rarely steeper than 30 degrees for climbers in the US)
- Realistic hold spacing (smaller holds, spaced relatively close together)
- Realistic hold sizes (small handholds AND tiny footholds)
- Realistic hold shapes (rounded edges, sharp edges, pockets, and intricate footholds that demand precise foot placements)
- Holds that cannot be pinched
- Holds that do not inadvertently result in large footholds when used as sidepulls/underclings/pockets (or mark such holds “off” for feet)
If you train at a public facility where you are unable to set your own problems, talk to your routesetters &/or gym management and encourage them to set problems that facilitate effective training. Gyms want to make their customers happy, so tell them what you want. They may even allow you to set some of your own problems. If that fails, make up your own problems linking in situ holds, or use the gym’s System Board to create your own problems (often System Boards are covered in a variety of realistic holds).
For those that set their own problems, below are a few recommendations of some of my favorite hold sets. If your local gym is lacking, consider recommending some of these sets to the routesetters. One general piece of advice: invest in high quality holds, especially if you have a small climbing wall. Good holds will keep you psyched much longer, and allow you to make the most of your training time. You’ll get far more mileage out of 10 good holds than you will out of 20 low-quality holds.
All of the sets described below feature realistic shapes that will be challenging on wall angles of 0 to 30 degrees overhanging. For each hold type, these are listed more or less in order of preference. The grade ranges are rough approximations and will vary greatly depending on orientation and spacing:

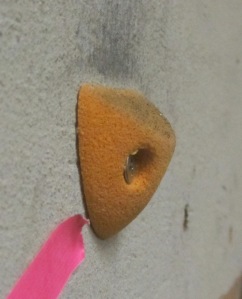
This pic of one of my “Comfy Crimps” says it all. You know a hold is good when you see 12 pieces of tape next to it!
Moderate Edges:
1. e-Grips “Comfy Crimps” These were my first set of holds, and they’re still one of my favorites. These edges are easy on the skin and rather incut. These are great for 5.12-ish climbers on a steep (~30 degree) wall.
2. e-Grips “Midnight Desert Crimps” This set includes a variety of sizes and shapes, that are generally a number-grade or so more challenging than the Comfy Crimps. Most of these holds are ideal on vertical-to-slightly-overhanging terrain, though some of the larger holds can be used on the steeps.
3. Entre Prises “Super Tweaks” These holds were the secret to my speedy ascent of To Bolt Or Not To Be. The north wall of the Lazy H is dead vertical and plastered with these irregular, sloping edges. These are nearly impossible to pull out on, so they require great balance and footwork. Perfect for improving technique on a vertical wall. These will challenge climbers form 5.11-5.14 depending on how they’re used.
Heinously Difficult Edges:
1. e-Grips “Ian’s Tribal” These guys are brutal–the most challending set in this list–they will transform you into a crimping fiend, assuming you can pull off the ground. These are 5.14 holds when mounted on a 30 degree overhang. Nearly all of my hardest Limit Boulder problems feature one or more of these. The pocket that comes with this set is also my favorite two-finger pocket (when oriented horizontally) and my favorite mono (oriented vertically).
2. e-Grips “2Tex Pure Crimps” These edges are awesome. They feature glassy-smooth texture on the backside so they are impossible to use as footholds. These are ideal when you want a sidepull or undercling that won’t produce a huge foothold. Most of these aren’t very incut, so they’re 5.13/14 holds on steeper walls, but 5.11/12 on less-steep walls.
3. e-Grips “Buttons” These are generally small, but very incut edges. Some of these can be used as footholds, some as handholds, but they work best overhanging terrain. These can be in the 5.12 range when used on a 10-degree overhang, up to 5.14 on a 30 degree overhang.
4. e-Grips “Hueco Patina Flakes” These are small but very incut edges. They’re much more irregular than most edges, which can provide a nice change of pace. Often you can get your fingertips “behind” the incuts on these, making them ideal for steeper terrain. These are generally a bit bigger/easier to use than the buttons.
Pockets:
1. e-Grips “Fossil Pockets” These pockets are smooth, deep, incut, and ergonomic. They’re on the large side, making for 5.12/13 terrain on steeper walls and 5.11/12 terrain on less steep walls.
2. e-Grips “Limestone Pockets” These are much more challenging than the Fossil Pockets, and the set includes a couple of mono pockets. When oriented slopey-side-down on a steep wall, these are 5.14 holds. When used right-side-up on vertical to 10-degree overhangs these are in the 5.11/12 range.
Footholds:
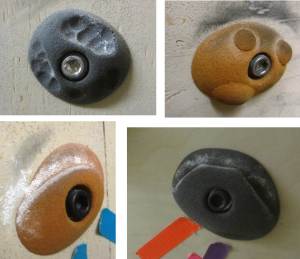
1. e-Grips “Double Disks” These are highly intricate footholds that require very precise placement and good core tension. Some of these holds can be used as hand holds too.
2. e-Grips “Drop Art Footholds” These are intricate footholds that aren’t quite as hard to use as the Double Disks, but they each offer many foothold surfaces so you can rotate them as they wear out. A few of the larger holds in this set can be used as vicious crimps.
3. Screw on Jibs. These are available from various manufacturers, including Revolution and Metolius. They’re cheap, easy to install and offer some very challenging shapes. Unfortunately they’re beginning to vanish from the market as gyms adopt elaborate wall surfaces that won’t accept wood screws.

Small, sloping jibs like this one from Revolution are great for vertical walls and “kick plates” below steeper walls.
4. Atomik “Bolt-On Feet” These holds are a bargain, but still offer some really interesting and challenging shapes. They all require accurate foot placements, and a few of them can pass for handholds on vertical walls.


How much translation would you say occurs if you train on a steeper angle than your project or home crag? For instance, my home crag is mostly at a slight overhang, 5*-15*. My least steep wall (other than the vert arêtes) is 23*. Being that indoor holds are still often more positive than outdoor, would training as you describe above with a steeper angle still translate to the crag?
LikeLike
That’s a great question. I think you’re okay if you stay within about 10-15 degrees. I think its a good idea to err on the side of training on walls that are too steep, simply because bouldering on a vertical wall (or even up to 10 degrees overanging) isn’t very enjoyable. You tend fall awkwardly and whack protruding holds on the way down, and this just discourages you from really trying hard. Additionally, try as we might to select realistic holds, artificial climbing holds are always going to be bigger and easier to use than the real thing. The easiest way to compensate for that is to train on slightly steeper terrain. The point is to not go overboard. If you’re climbing on anythng steeper than 45 degrees, you’re sacrificing some significant specificity.
As a point of reference, the two walls I boulder on are 10 degrees overhanging and 33 degrees overhanging. The vast majority of my Limit Bouldering time is spent on the steeper wall.
Mark
LikeLike
Thank you for the practical training-centric hold reviewing. Those are great ideas for my woody.
LikeLike
amazing blog post. the hold set recommendations are invaluable. thanks.
LikeLike
Great post!
Bought Ians tribal and the fossil pocket sets after reading the post.
Do you have any experience with the retro tribal crimp e-grips set?
I want something wicked for a vertical wall.
Other e-grips sets that would fit for this?
Going to buy the rptc, and tought I would add some holds to the order.
Buy the way, any news on when the book is out?
LikeLike
I haven’t used the Retro Tribal Crimps. I usually go for more simple shapes. For a vertical wall, the 2-Tex Pure Crimps are great, as long as you don’t orient them with the best surface facing up. Midnight Crimps are another good choice. Some of the footholds sets can be good on vertical walls if you want really small positive edges. If that’s what you’re after, the Double Disks or Drop Art Footholds would be good choices. Note the Drop Art Footholds offer much smaller gripping surfaces than the Double Disks, so they will be more difficult to use.
It’s looking like the book will be out around late March or early April.
Mark
LikeLike
When you are bouldering for power, do you use structured interval sets ( with time on the problem followed by a rest period)? If so what is the basis for the interval, does it correspond to the nature of the routes that you target for the upcoming season, or is there another basis? And how do you measure/quantify progress?
LikeLike
Rui,
I do not use structured sets when I’m Limit Bouldering. I have a stopwatch running, and I keep an eye on how long I’m resting between attempts, but mostly I go by feel. I quantify progress by attempting and sending problems, and by repeating problems I’ve previously sent.
Mark
LikeLike
Hi,
I guess you kind of replied to this question earlier, but I’m at a loss in here. Regarding limit bouldering do you have any idea of how many boulder problems one should try per session? How many tries on each boulder problem? I’m thinking on 4 to 5 minutes rests. Is it too much? (ok, there is no such thing as too much rest in the power phase, but could it be shorter?)
By the way, I’m really eager to get your book (already made my subscription!)
Cheers,
Tiago
LikeLike
Tiago,
This is described in detail in the book, but to summarize, once you have completed numerous warm-up problems, and you are working problems at your limit, you should only try 2-3 problems in a session. Realistically its difficult to seriously try more than two. On those two problems, make around 5 attemptes per problem. This can get confusing, because what counts as a try? Starting from the beginning and attempting to send the problem is not the same as simply trying to do a single move (such as the crux move), so take that into account. The goal is really to feel completely fresh for each attempt, so rest as long as that takes, and continue to attempt the problem until you can no longer give a high wuality effort to each attempt.
Mark
LikeLike
Pingback: Frankenjura Dreaming | The Rock Climber's Training Manual
thanks for the detailed workout schedule. will try it at the local gym
LikeLike
Pingback: Designing a Home Training Wall | The Rock Climber's Training Manual
Pingback: The Anatomy of A Limit Boulder Problem | The Rock Climber's Training Manual