Last week I described my exciting return to the desert (more specifically, the legendary sandstone climbing of the Colorado Plateau – a large region spanning 4-5 states). Here is part 2….
In the mid 2000’s, I was tearing through Zion National Park, obsessed with the idea of free climbing big walls, or long multi-pitch routes. I was captivated by the rock, which formed beautiful splitter cracks, and intricate patina face holds, all on gigantic walls, reaching heights up to 2000 feet tall!
During my efforts to free the North Face of Angel’s Landing, I learned that seemingly blank faces such as this, actually were covered in tiny patina face holds that could be free-climbed!
In a flashback article last fall, I described my first, first free ascent (The North Face of Angels Landing – aka, the Lowe Route). This climb was an epiphany because, in the process, I learned that seemingly blank stretches of rock (devoid of cracks) could often be linked with face features. Typically, on long trad routes, the climbing is forced to follow cracks, but because of the unique geology in Zion, long stretches of face climbing are possible, which wildly increases the possibilities.
During my Zion spree, I met local photographer Eric Draper, who soon introduced me to Bryan Bird, around 2006. Bird is a great guy. He has put his heart and soul into the climbing in Zion, generously developing routes that appeal to a larger audience than previous generations of Zion climbers. He has put up outstanding routes from dozens of single-pitch crag routes, all the way up to 2,000 foot bigwalls that maximize adventure. Brian wrote the current guidebook to Zion, which I was happy to be able to collaborate with him on (I wrote the “modern history” section, and a few climbing vignettes).
In March 2007, I went out to climb with Brian, and he showed me a route called “Rub it Raw” that he had been saving for the “right” partner. Located in the “Cragmont” zone (near the Mt Carmel Tunnel), the route was “only” about 600 feet tall, and 5 pitches, but it was a beautiful route. He had made the first ascent of the route as an aid climb a few years before, but knew it was begging to be free climbed. See if you agree 🙂 ….
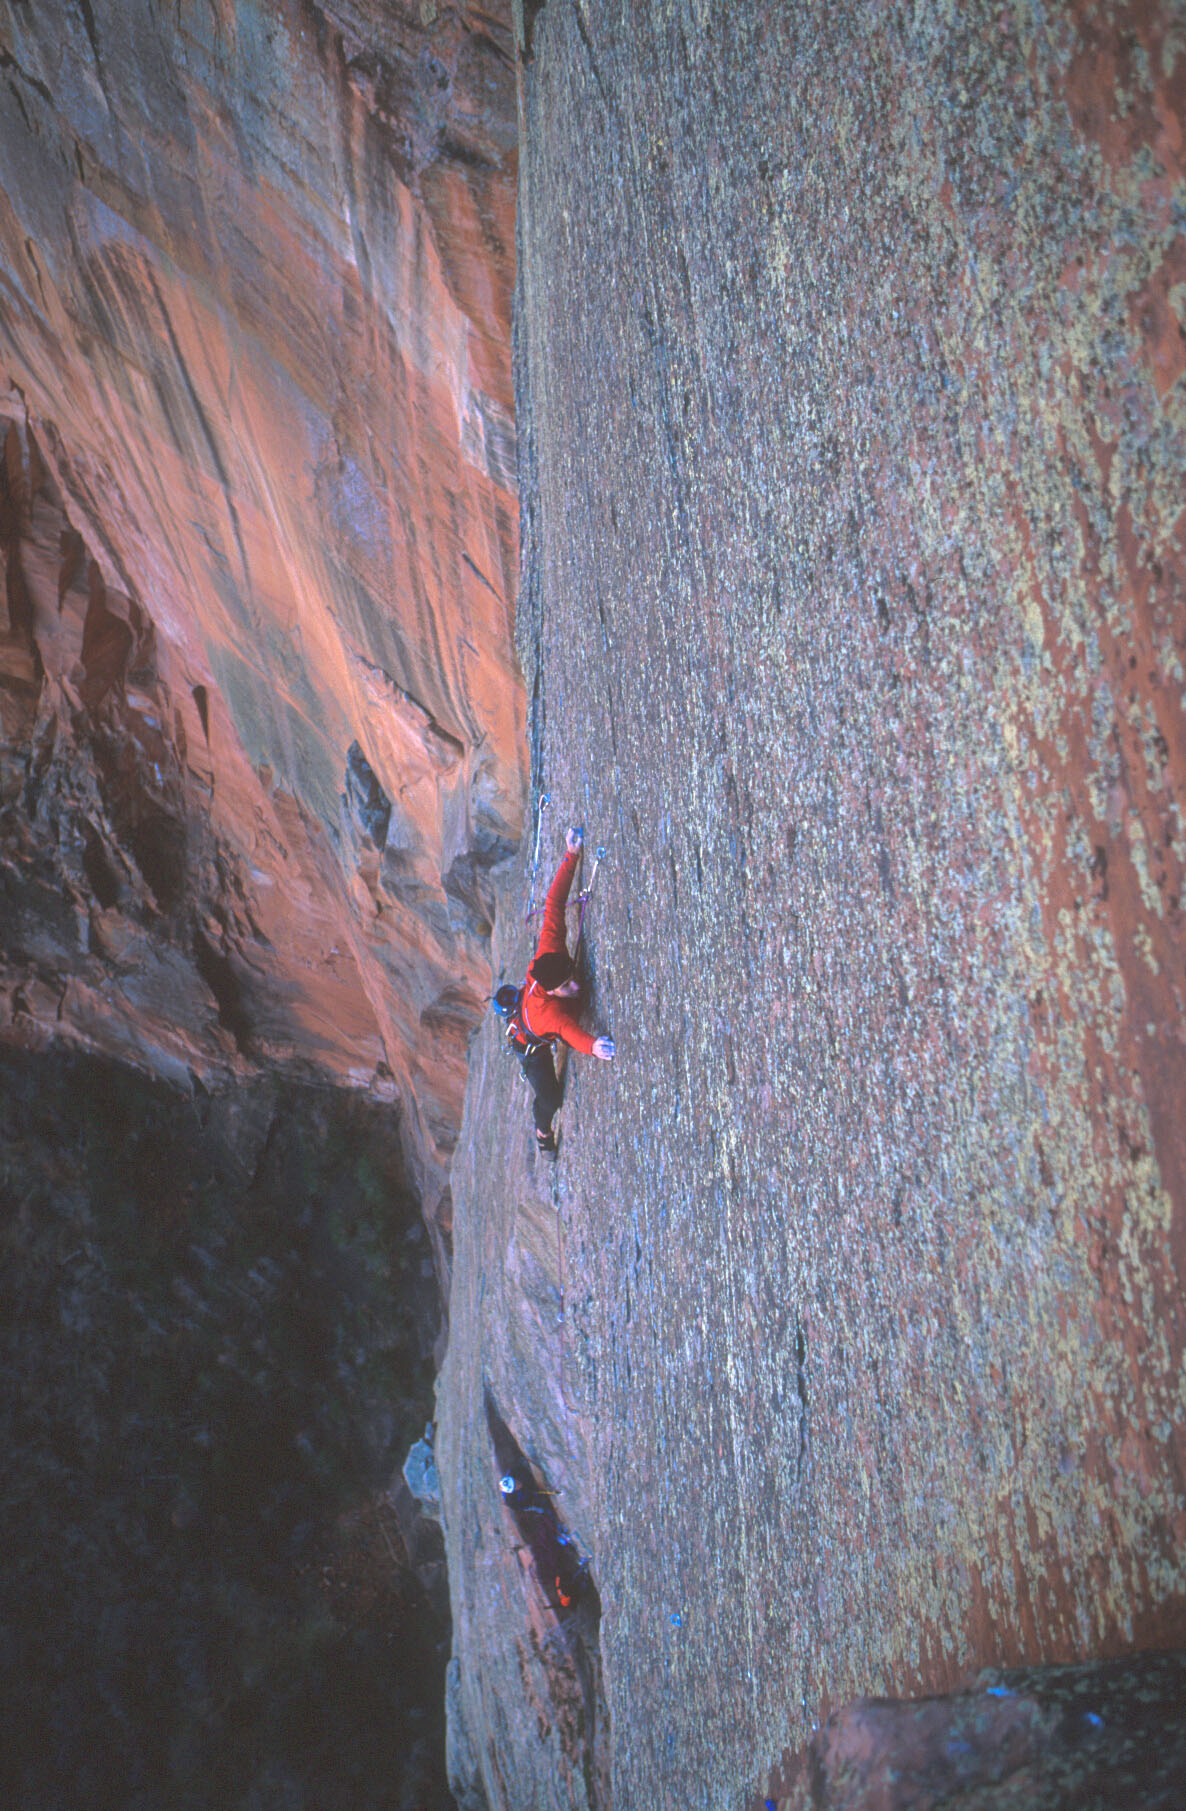
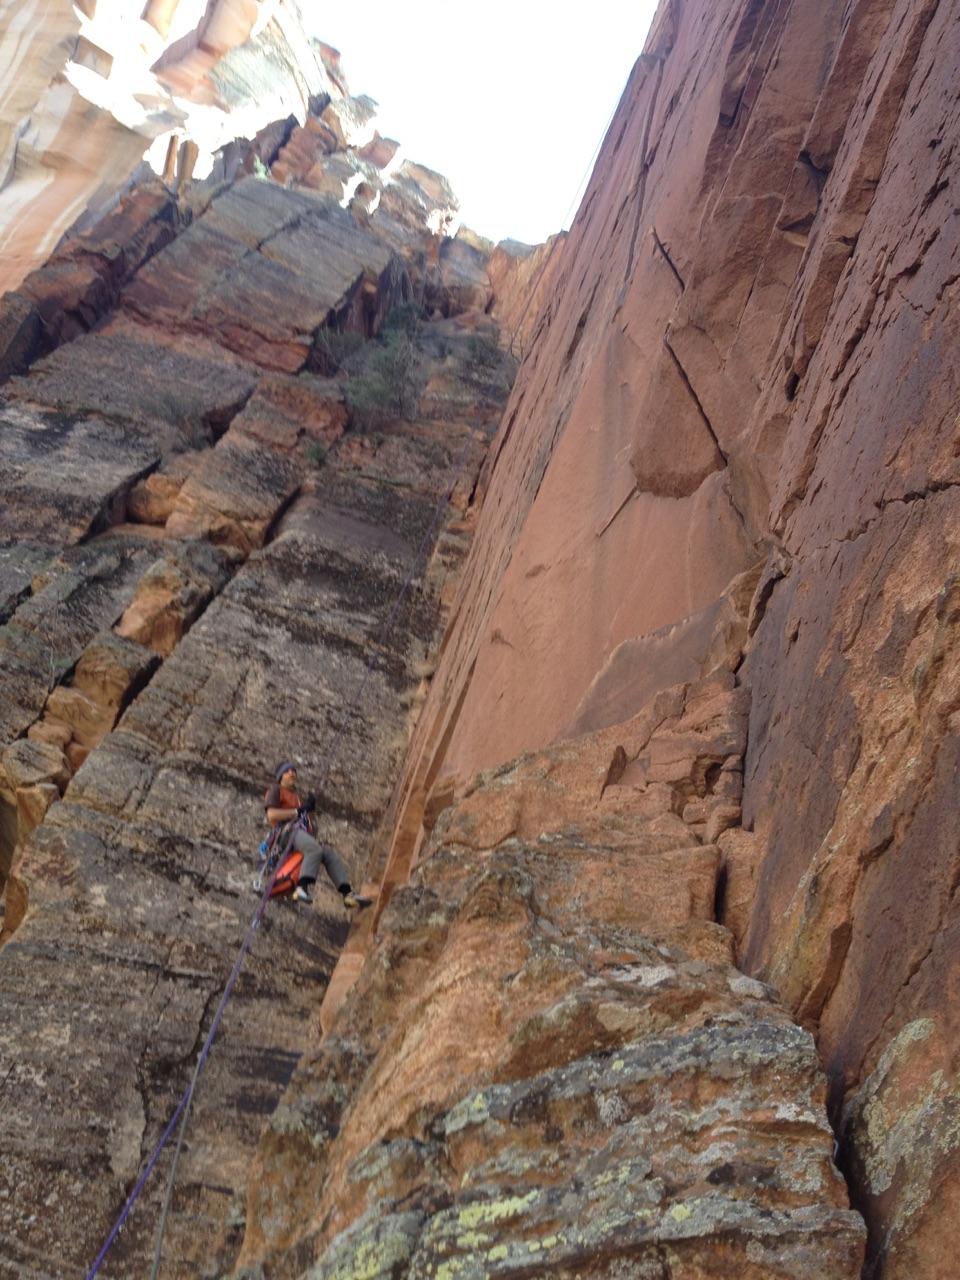
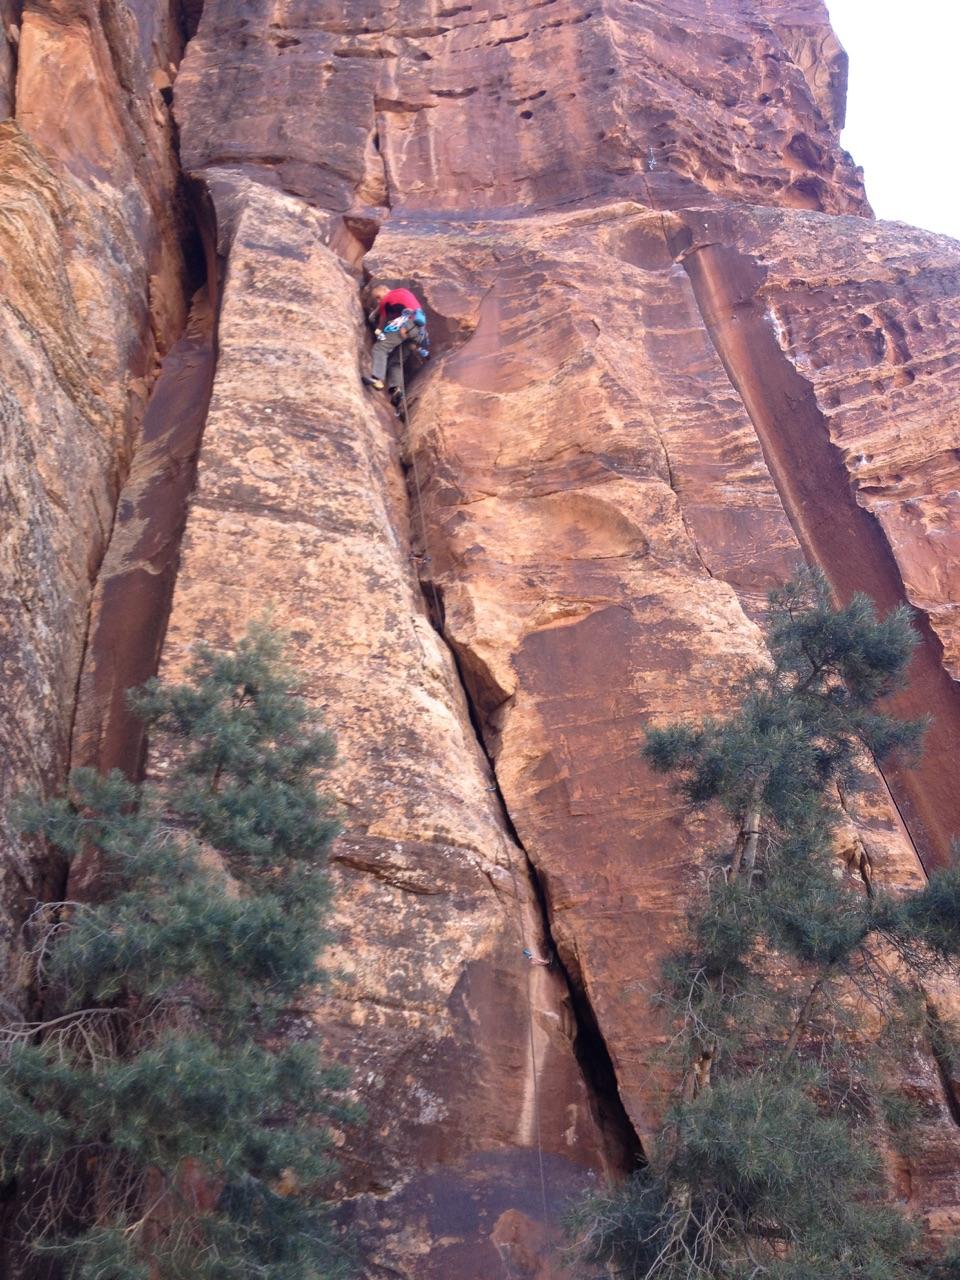
Pitch 2 of “Rub it Raw” – a gorgeous splitter finger crack that ranges from 0.75″ – 0.5″ for most of the way. It pinches down tighter for a technical crux right near the end!

Pitch 4 of Rub it Raw – Starting from a nice ledge, it climbs a slightly overhanging, arching splitter that starts with a 1″ crack, then widens to 1.25″. These are often considered the toughest sizes to jam, and promised to be a very challenging pitch.
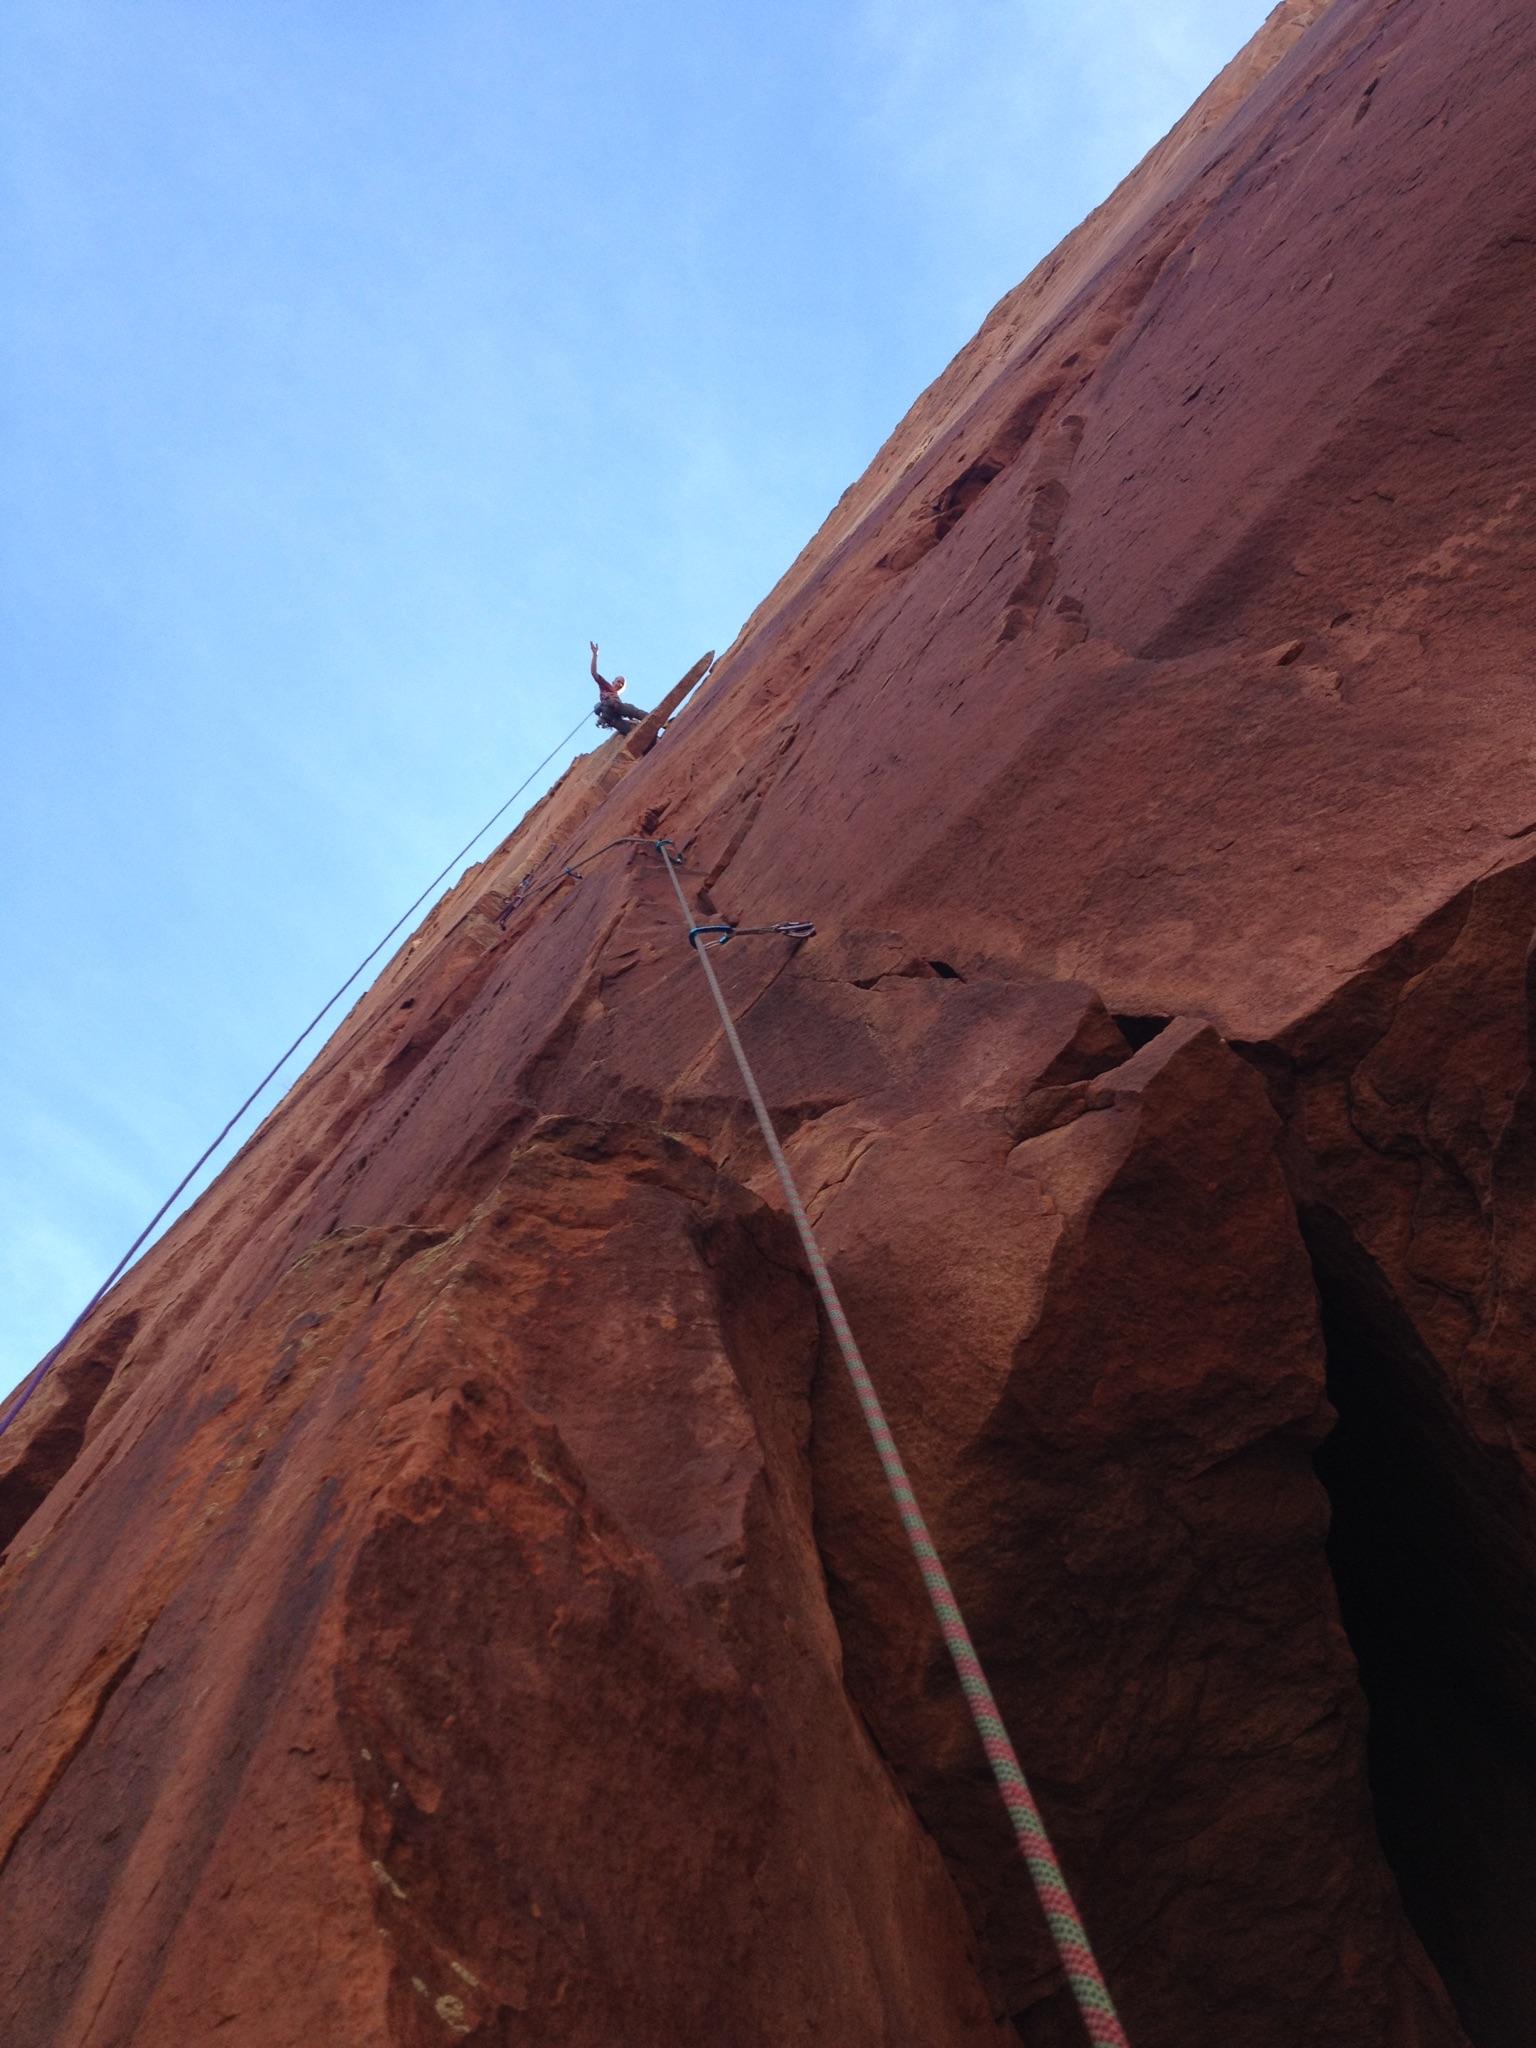
Pitch 5 of Rub it Raw – Another striking splitter, that is slightly offset and varied in size. The crux pinches down to tips, and requires bold climbing above nuts ~ always an exciting proposition in Zion’s soft rock.
In 2007, Brian and I went out one day and reached the top of the 2nd pitch. Pitch one is a nice 5.10 varied crack pitch with an exciting start, but Pitch 2 was the gem. On that day, I did all the moves, but didn’t send. We spent some time adding a new belay anchor (visible at the top of the Pitch 2 photo above, if you zoom in – look for the pink cordellete) closer to the arête that would follow a more logical path for free climbing by utilizing a nice swath of patina face holds (whereas the aid route continued up the ever-narrowing crack). As a result of this re-engineering, we had to place some bolts, drilled by hand, which took up a lot of our time. Unfortunately, I wasn’t able to climb with Brian any more that week because of his work schedule. I went back out on my own to add some bolts for the free climbing variation, drilling on lead from hooks (fun, fun!)
That was it. Brian and I could never get our schedules to line up, and I never made it back out to try the route again. I had been introduced to an absolutely beautiful pitch, I had put two days of effort into extending the route upwards, and I was extremely tantalized by the upper pitches, but I couldn’t try them!!! It was extremely frustrating. A year later, I moved to Ohio, and although Bryan and I collaborated on the Zion guidebook, I didn’t get to climb there. All the while, my dreams were filled with wonder over those amazing splitters, and my nightmares were consumed with thoughts of somebody else getting there first….
So for EIGHT YEARS I agonized over this route, yearning to get back on it, and at least just see what the upper pitches were like. Could they be free climbed? Could they be free-climbed by me?
Finally, I had my date with destiny. Brian had generously held the route in reserve for my return, and was psyched when I called him out of the blue to go try it. As I described last week, I put in some practice time in Escalante Canyon to prep for the thin cracks. I had a four-day trip to Zion planned, and hoped I could at least make it to the upper pitches. In 2007, we had been to the top of pitch 2, and knew that we would need to do some un-protected face climbing on Pitch 3, so I wasn’t sure how hard it would be to get to the splitters on pitches 4 and 5. We might need to do a lot of lead-bolting, which is time consuming (and scarry!)

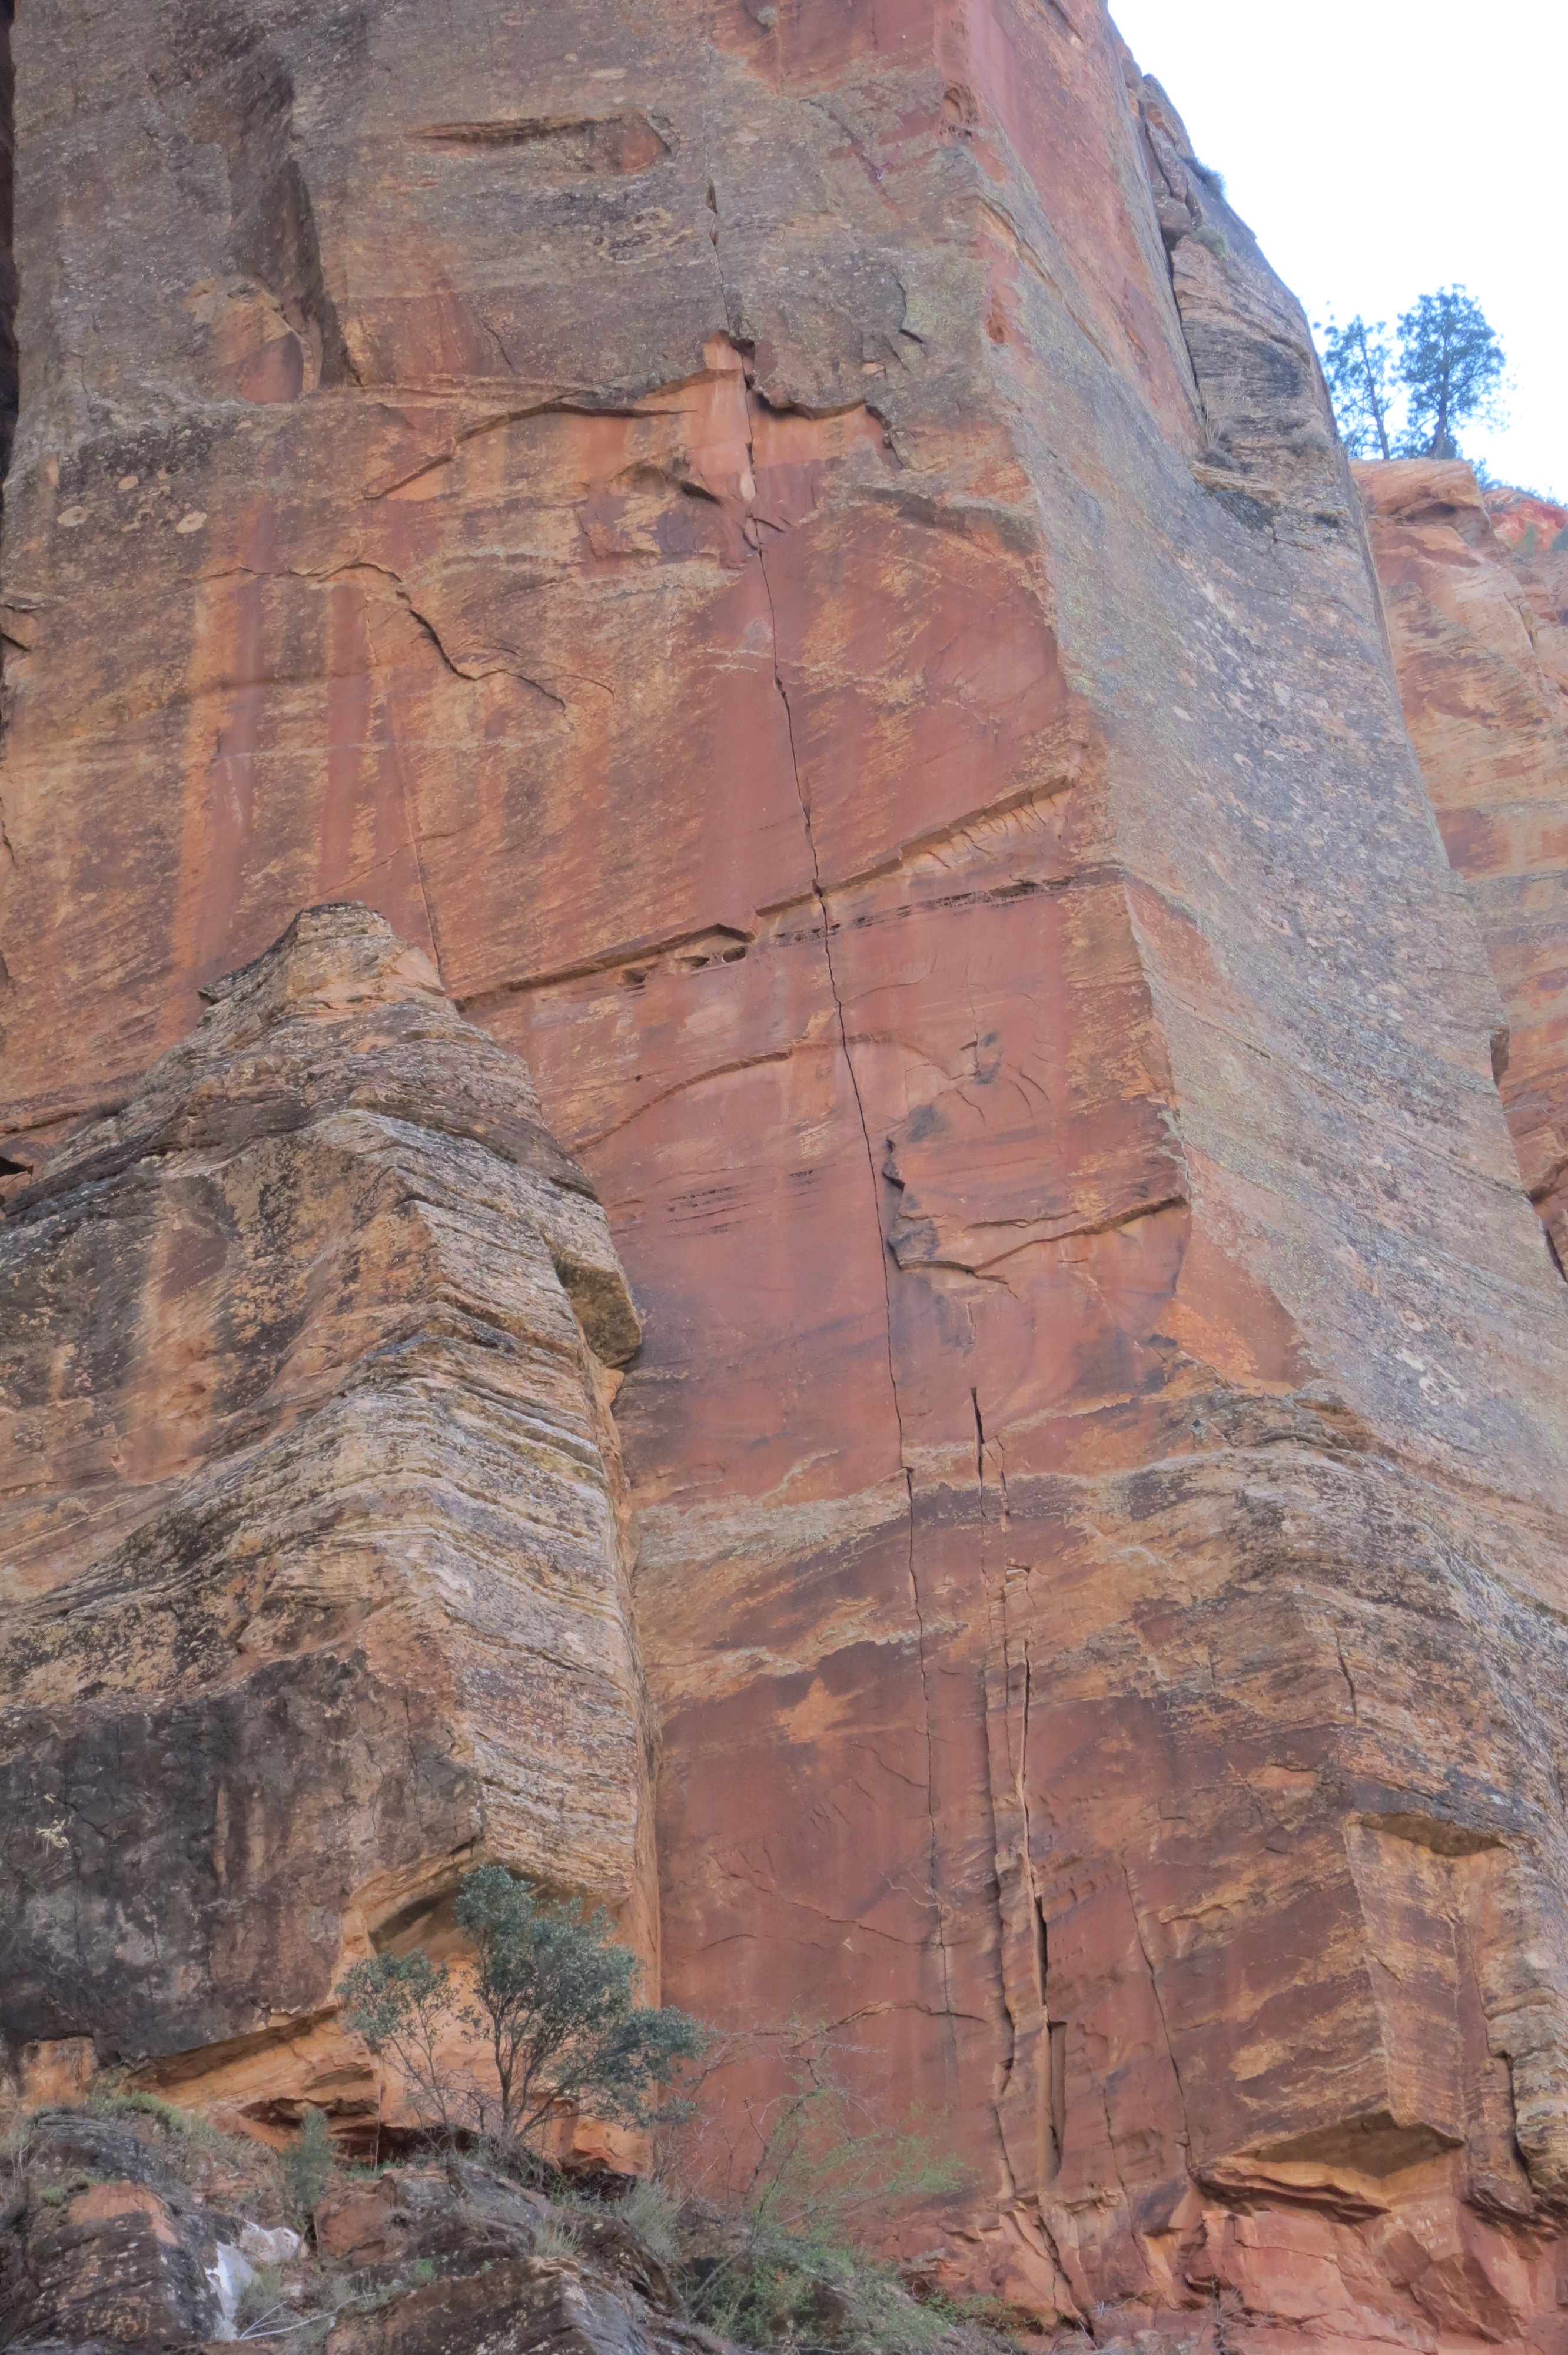
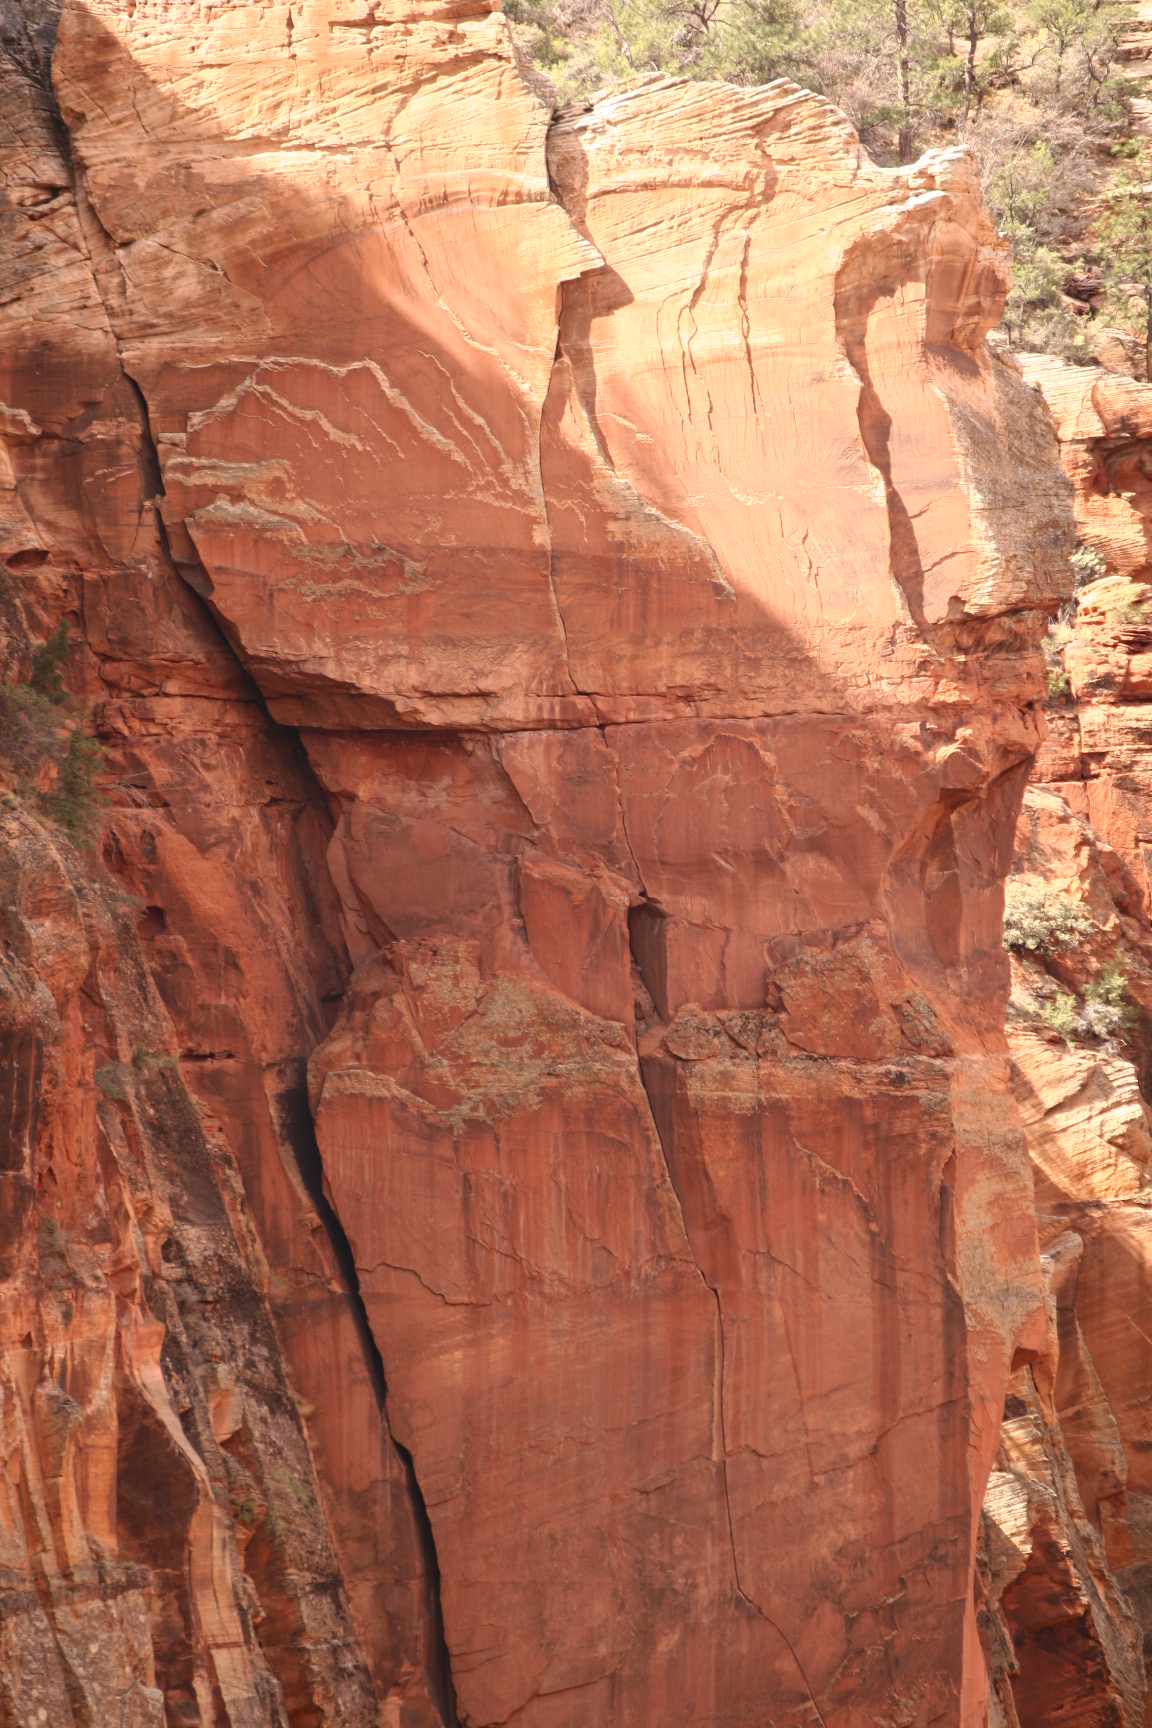
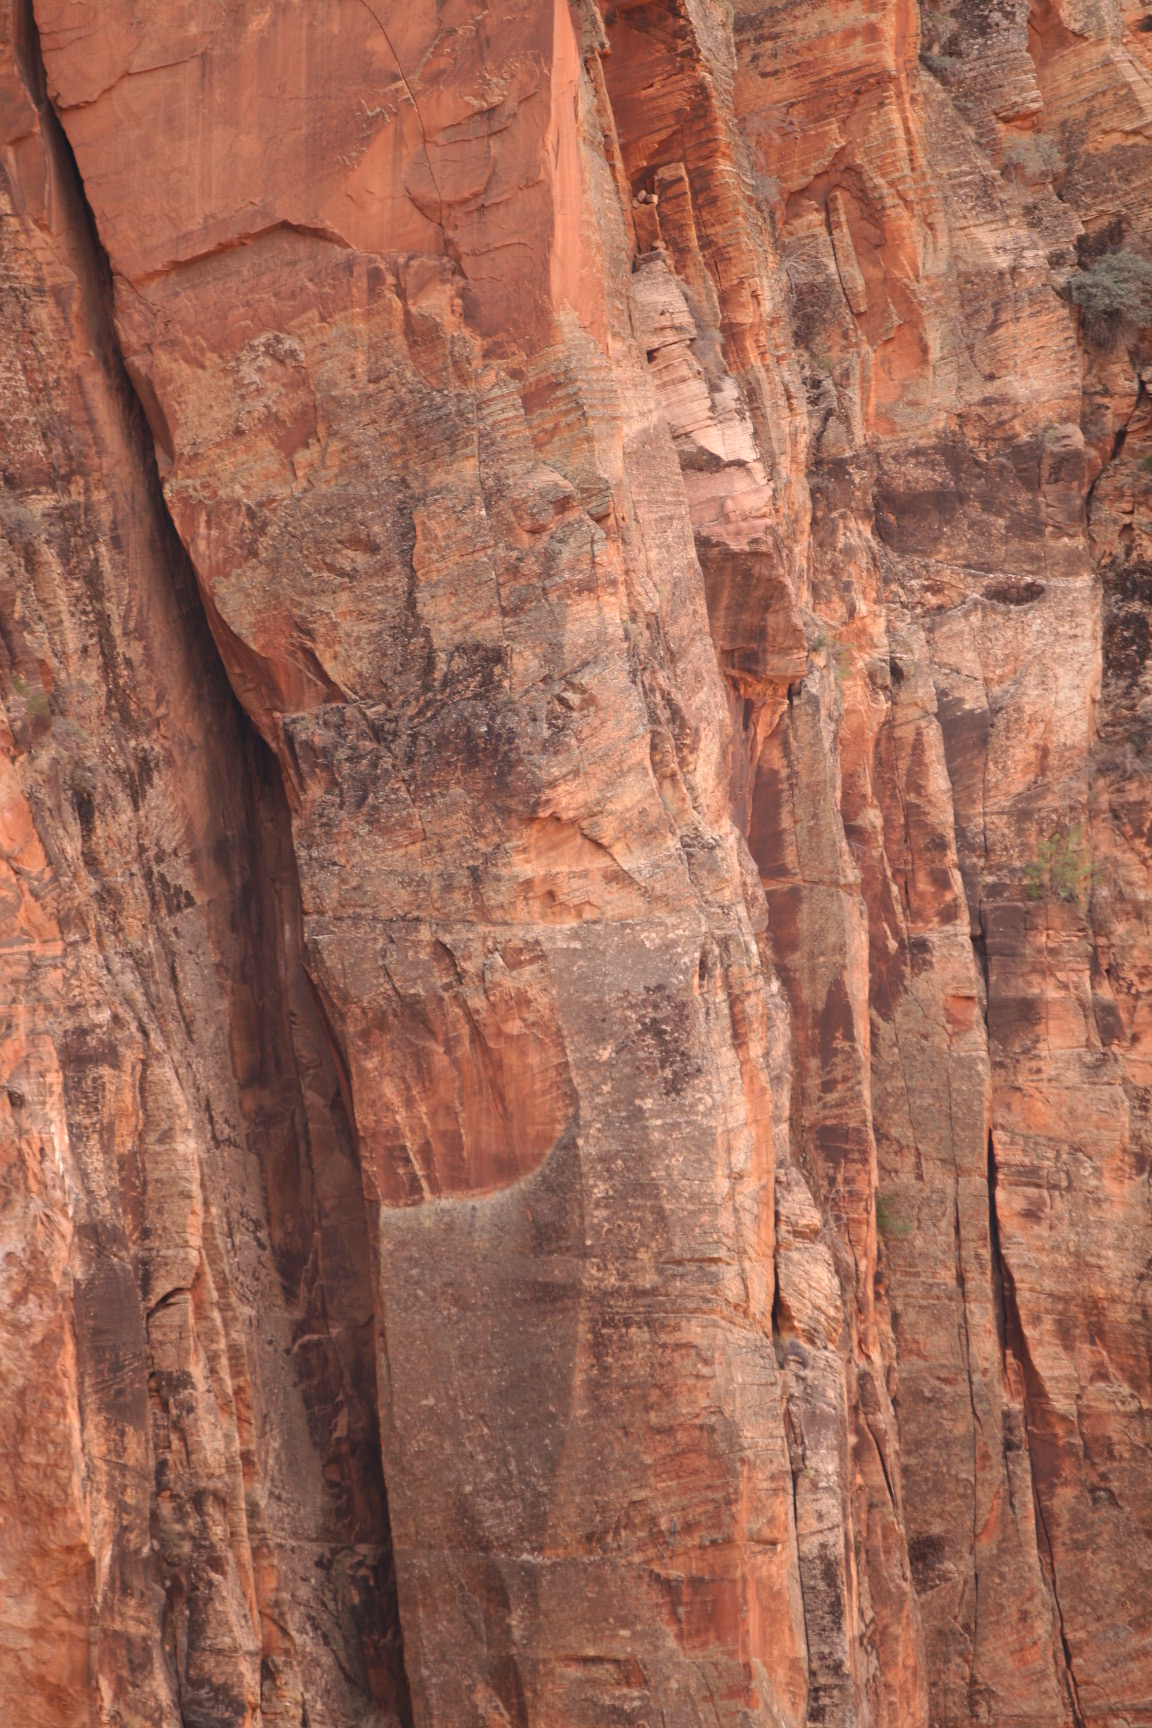
Scoping out “Rub it Raw” from the Great Arch overlook, the day before the climb.
So, we raced West on Wednesday afternoon, headed for Zion. We crashed at the Bird residence Wednesday night. We were able to catch up while racking for the climb the next day. Both of us were family men now, so after Brian got his daughter Lillian out to school, we headed for the Canyon.
Brian took the first pitch, which was right up his alley. It starts up a 10-foot wide crack on some lower-quality rock that is sandy, and a bit dangerous because of the bad gear – Brian’s specialty. He got through it no problem, and raced up the rest of the pitch to the spacious ledge.
Aside: Part of the challenge for me in coming back to this style of multi-pitch climbing is re-learning the systems and techniques used to deal with the logistics. It’s a lot different than single-pitch cragging, which I had done almost exclusively for the past 7 years. Back in my “prime” I had all my tools and techniques for multi-pitch climbing perfectly dialed: how I build belay anchors, how I attach to the belay, how I haul gear, what gear I bring, how much water, etc. This had all been obscured by the sands of time, and though I had vague recollections, I needed to work out the details. Brian and I got it figured out, but it was anything but perfect. Fortunately, this route was “only” 5 pitches.
Pitch 2 was all mine! I grabbed a selection of gear and headed up with butterflies in my stomach. It had been a long time, and I hoped to get a deja-vu, or “virtual” onsight of the pitch. It starts with some loose, stacked blocks, but the climbing is easy, then gradually gets harder as the crack narrows to fingers and finger tips. Fortunately, there are nice footholds occasionally that allow a rest. I did my best to manage the mounting pump. Near the top, the crack pinched down to finger tips, then smaller, right when the footholds run out — the crux! I placed a tiny 0.4″ cam, crimped the edge of the crack, put my foot on a sandy sloper, and reached upward. A moment later I was sailing through the air. I felt a slight tug on the rope, then kept falling, eventually coming to rest about 30 feet lower. I had ripped out the 0.4″ cam, which isn’t surprising in Zion, and was barely caught by a 0.5″ cam (it slid a bit out of the crack and only 2 lobes were fully engaged!
I pulled back up, and reset my gear, then climbed above to place a bomber hand-sized cam in a higher pod. Feeling safer, I lowered down and worked out an intricate series of liebacks and foot moves that utilized the edge of the crack as a crimper and/or gaston, as it was too narrow for me to jam. Fortunately, there were enough slopey dishes to use as footholds to enable the tricky sequence. I identified the hold my foot had popped off of to cause the fall, and found one in a better position, closer to the crack. I asked Bird to lower me. He was surprised, as this was unusual for him and his partners…he is used to just climbing upward no matter what, but I was determined to send the pitch.
I rested about 10 minutes while Bird pulled the rope, then started up again. The climbing went much faster this time, as I felt more confident, and knew the moves better. I soon hit the crux, placed a solid 0.5″ cam (eschewing the marginal smaller one that ripped last time), then drew on my recent years of sport climbing: “believe in the beta…just execute the sequence!”

The Tenaya Tarifas happen to be GREAT for hard trad routes!
Using a combination of high steps with my trusty Tenaya Tarifas, and very powerful crimps on the crack edge, I moved higher up the crack, higher above the gear, but I decided not to think about that; it was a “clean” fall. Before long, I hit a nice handjam that signaled the end of the crux. I placed a bomber hand-sized cam, then moved out right onto the face, using the bolts I had placed back in 2007 to reach a really cool belay stance perched on the edge of the arête. The first crux was in the bag! It’s a great pitch that is probably 5.13-, and would be harder if you have larger fingers.
Sidenote: This was my first multi-pitch route climbing in Tenaya shoes. I chose to go with the Tenaya Tarifas sized a half size bigger than what I would wear for an extreme sport route, for more comfort. These were outstanding! They are comfortable enough to jam in, and still precise enough for technical footholds and thin cracks. Just size them up a bit, and take them off at the belay after each pitch.
Pitch 3 – Starts from a shallow ledge near the arête. Climbs the arête for about 30 feet, then crosses over to lower angle cracks using awesome patina face holds.
Pitch 3 was really cool. As I mentioned earlier, back in ’07, I had been able to put in three bolts to start the pitch, and I hoped it would be enough to get us up to pitch 4. On the aid climb, the boys had used a very thin seam further left, then did some hooking to reach bigger cracks. I had re-engineered the pitch for free climbing, and it would require some bold climbing off the belay to reach the better cracks. With a few bolts in, though, at least I wasn’t facing a “factor 2” fall onto the belay.
It was a thrill to climb the initial arête, and I felt free as a bird up there with all the exposure! I used a handful of Trango’s Phase Quickdraws, which were awesome for this kind of climbing. I never used to like the thin-webbing style draws, but these Phase draws have made me completely abandon that nonsense! The Phase draws are so light and slim, they never got in the way, and they are super easy to clip. When the bolts ran out, I had to run it out to for about 30 feet, but the climbing was relatively easy, and I knew from my years of experience in Zion, that these face holds are pretty good. Brian was less sure…. I just make a point to maintain “3 points of contact” in case a hold breaks. I reached a horizontal crack and got some gear, then continued to the belay. While following, Brian was not impressed with my gear placements, and he promised to place a bolt or two on the way down, to make the pitch more reasonable.
Finally, I had made it to pitch 4, the object of my dreams for 8 YEARS!!!
It looked beautiful, but maybe a little easier than we had remembered. Like the “white whale”, this pitch had grown in my mind, and I remembered a 1.125″ crack through a featureless wall that overhung significantly for 100+ feet. It conjured visions of 5.13+ or maybe even 5.14. However, what I saw when I arrived at the base were two relatively short bulges split by a 1″ crack, that arched over to an offset 1.125″ crack. It was not as steep as I remembered, nor did it look so sustained. I was both relieved, and a little disappointed, but regardless…it was going to be an outstanding pitch!
Pitch 4 as seen from the belay. Note the two short bulges, and the splitter offset above.
I racked up with 4x 1″ cams, 5x 1.125″ cams, and one or two 1.5″ cams, and headed up. The first two bulges were powerful, but short-lived, and the arching leftward traverse offered a little recovery with a short hand-jam pod. I started up the ring-lock sized 1.125″ crack, and focused on my breathing to manage the pump. This is a skill I completely lacked back in 2007. My years of sport climbing at the Red River Gorge had taught me self-control and pacing, and it served me well here. The long hiatus from trad climbing had some benefits to it….
As I climbed, the wall became a little steeper, and smoother, and the jams more powerful. The crux hit right near the end of the pitch, just as the pump was strongest. While I had been jamming straight in, I was now forced into a steep lieback out right that utilized the offset nature of the crack, but being such a small offset, it made the moves balancey and tenuous. I soon wondered if the lieback was a bad decision, but I was committed now. Too desperate to place gear, I ran it out, aiming for a point where the crack widened and a hand jam would be possible. As I fatigued, the distance between my feet and hands grew — lessening the load on my hands, but increasing the chance that a foot would slip off on the sandy rock. Just below the hand jam, I had to make a tenous mini-dyno, and feared the worst – a foot pop. Boom! I hit the hand jam! I cruised that last 20 feet to a spacious chimney. I had just on-sighted my dream pitch!
I was very psyched, but like I said, also a little disappointed that it turned out “easier” than my mind had built it up to be. Then again, I am a lot stronger climber now than I was in ’07, and that’s part of the process of improvement. It’s ironic that a possible downside to improving at climbing is that climbs that might have been a long struggle, and thus, a very meaningful experience, can be climbed relatively quickly and easily as you get better, and don’t seem as memorable. Nevertheless, it’s hard for me to imagine forgetting about this dream splitter!
Pitch 5 was the last pitch, and it seemed like more of the same. A nice splitter with a little offset to it. It was a bit more varied in size, and it looked pretty narrow in spots. Bird recalled using a lot of nuts on the pitch when they aided it, and that made me nervous because that could mean it’s too small for fingers.
Spoiler Alert! Looking up at Pitch 5.
Pitch 5 started with some nice wavy crack climbing that allowed occasional hand jams and good gear, then a small ledge for a brief, poor rest. The next section would be the crux; a small offset in lichen-covered, yellow rock. This can sometimes indicate lower rock quality in Zion, but it looked pretty good to me. The crack narrowed significantly, starting with pretty good finger-sized cams, then narrowing further. Fortunately, the wall was steep, and I was high off the belay ledge with many good pieces of gear below me, so if my gear did fail, I would sail safely into space. Fortified by this thought, I resolved to just focus on the climbing, and not be held back by “phantom fears”. I worked my way up the offset, liebacking to the right while quickly placing smaller and smaller cams. These were generally “blind” placements, so I had to trust my intuition and experience. Near the very top, the crack narrowed to nut size, and I placed what felt like a pretty-good small nut ~ about the size of an iPod earbud. Just then, the crack leaned over to the right (visible in the Pitch 5 photo above), which made the lieback ever-more powerful.

Trango’s Chockstones. The #4 (towards the left) is about the size I placed.
I had to turn on the power, and bust out some very hard moves above sketch gear. My years of climbing at the Red really paid off here, as I didn’t fear the potential airtime, and I knew how to stay relaxed. After about 10 feet, the crack mercifully widened, and I got a bomber finger lock that I could use to place a solid cam. I worked my way up to a rest below an ominous protruding flake, and breathed a sigh of relief. I placed the sole 5″ cam that I had hauled all the way up 5 pitches (on Brian’s insistence ~ thanks Brian, I was glad to have it!) What appeared to be a 3-4 foot tall flake was actually about 10 feet tall, and I did some spooky/sandy under-clinging and lie-backing to get around it. This is the good-ole Zion I remember! It’s not a true Zion experience unless there is some funky/scary weirdness to deal with somewhere on the route!
When I stood on the flake, the pitch was over, and I was at the summit of the wall. After 8 years of longing, I had finally done it, and I couldn’t be happier!
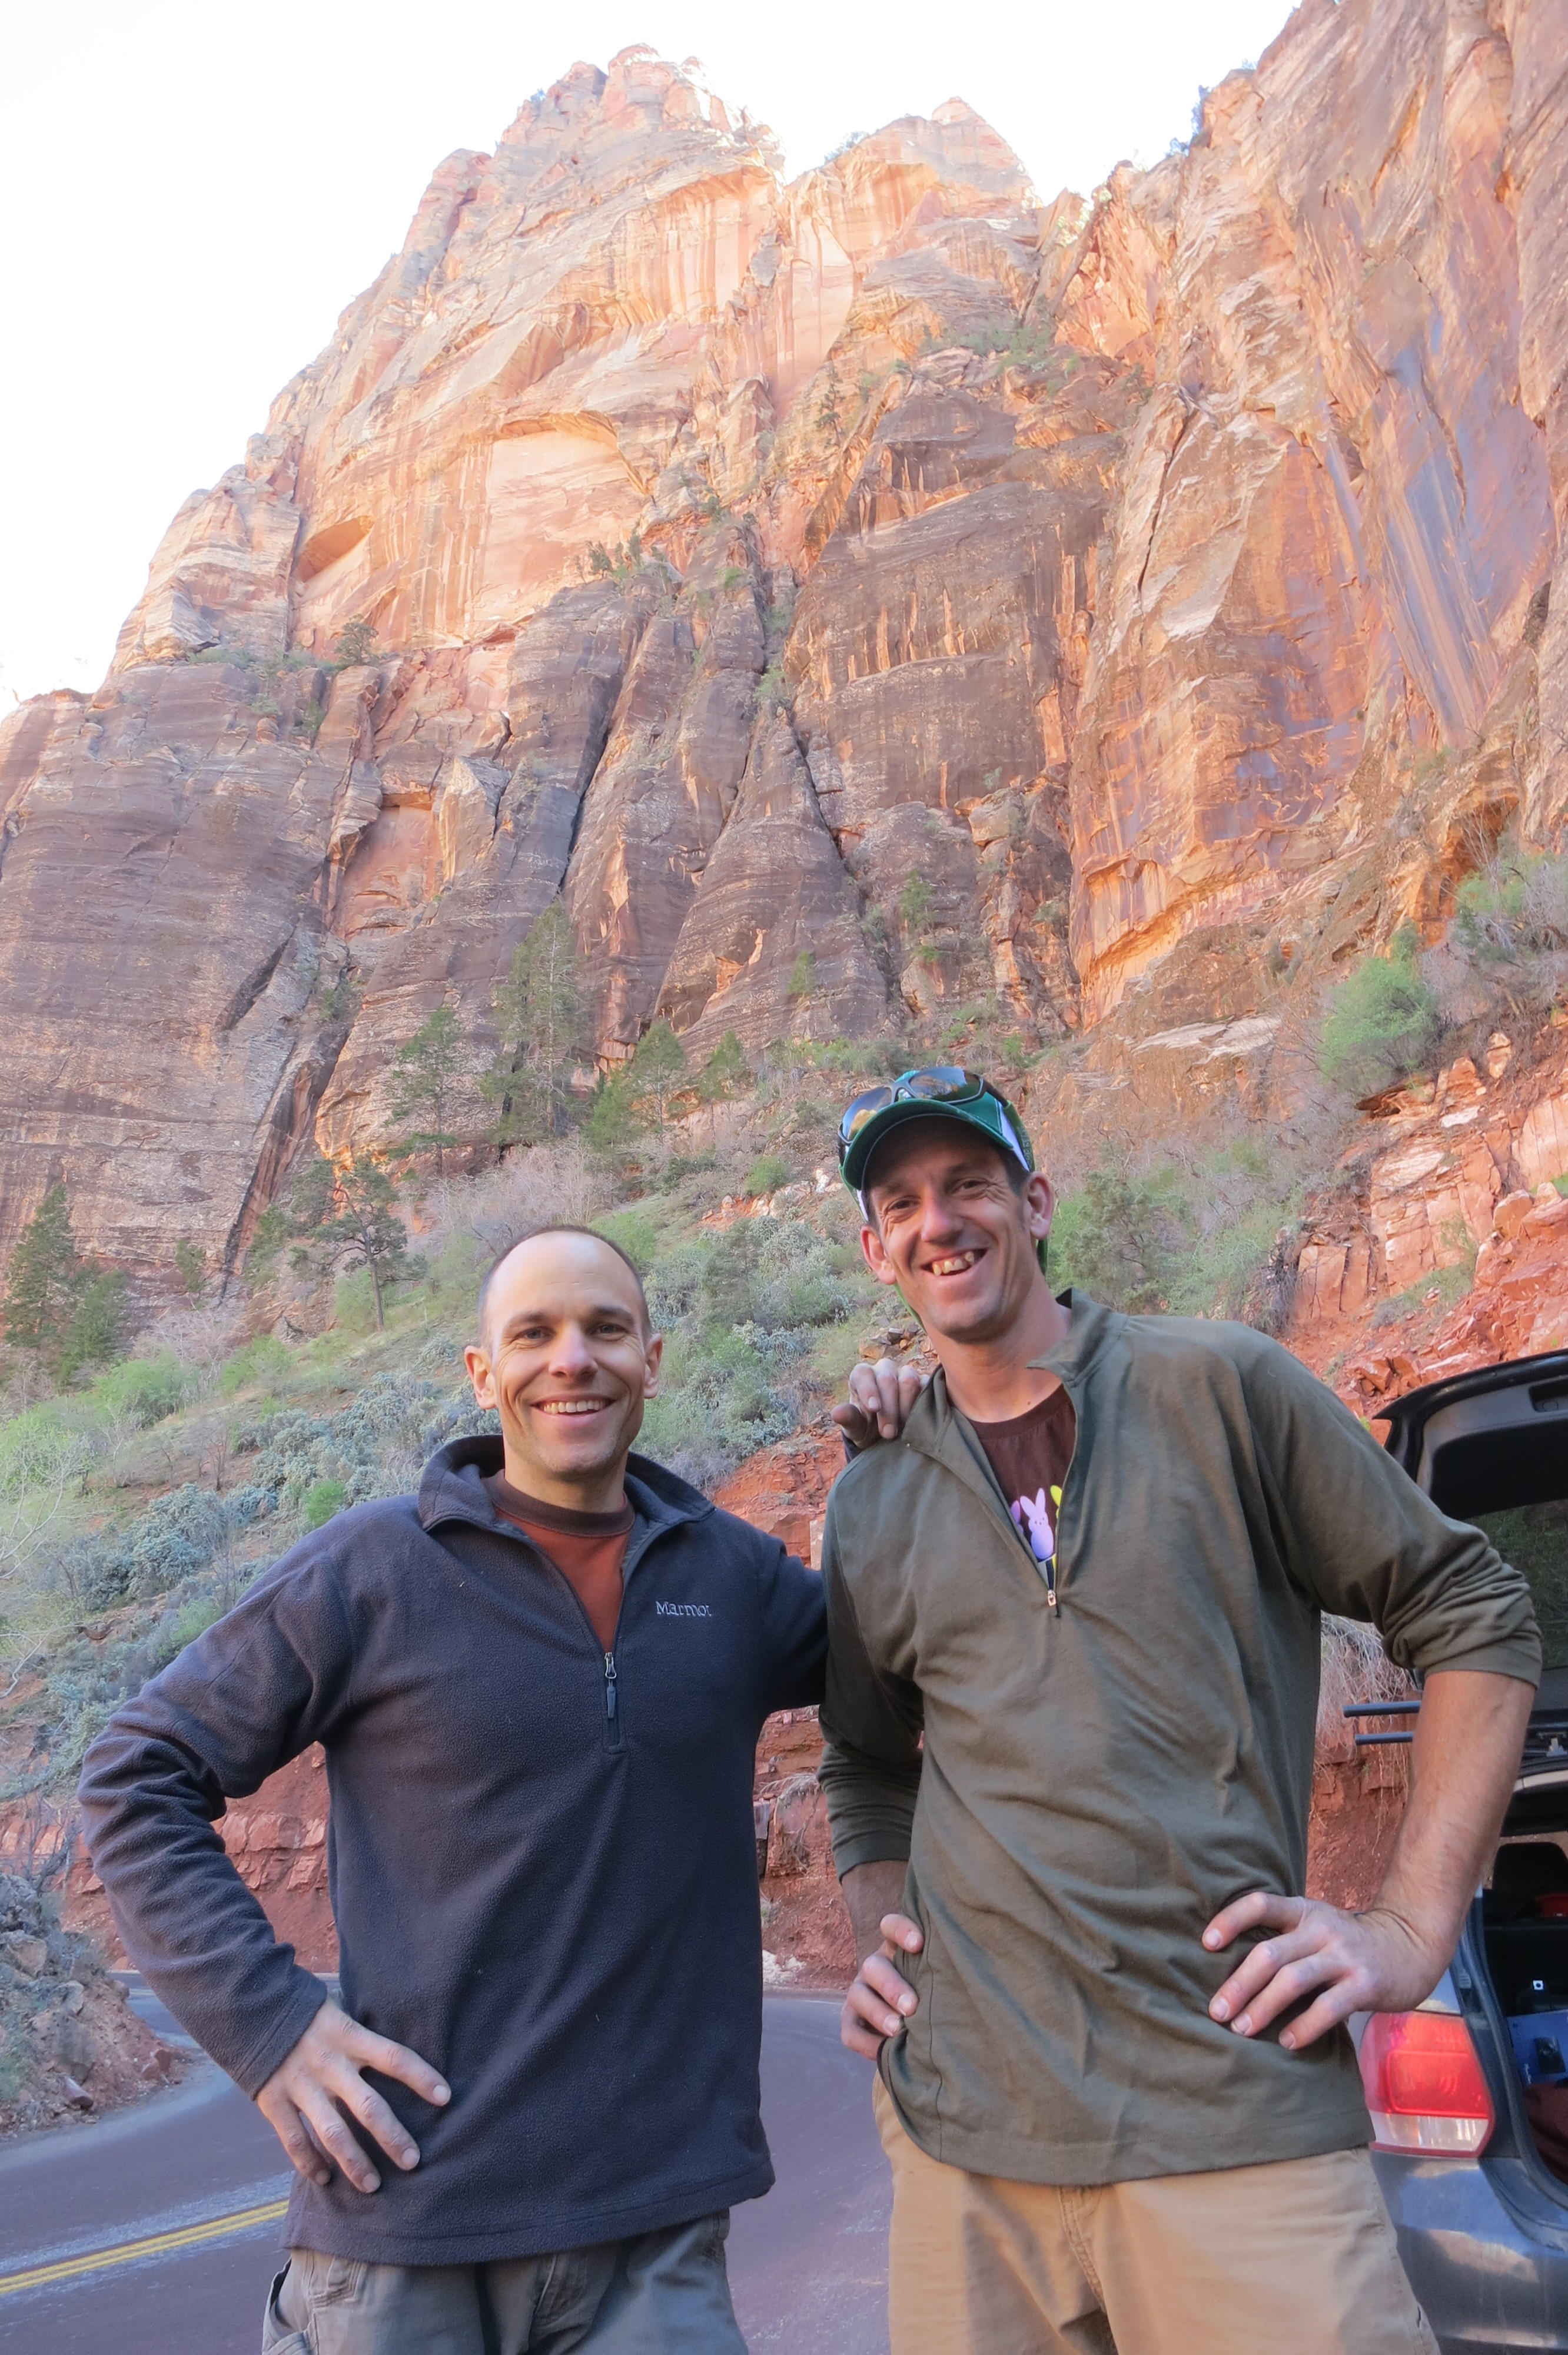
Celebrating the send with Brian.
Here’s my breakdown of what I think is now the best hard, mid-sized multi-pitch route in Zion:
Pitch 1: 5.10+ R off width to hands/fingers 150′ (Brian intends to add a bolt or pin to the start, to remove the “R” rating)
Pitch 2: 5.13- *** 90′ Fingers – all-time great pitch!
Pitch 3: 5.11- ** 150′ Face to featured slab and sandy cracks.
Pitch 4: 5.13- *** 90′ Ring locks – all-time great pitch!
Pitch 5: 5.12+ *** 90′ Varied sizes with tips-sized crux
I’m bummed we didn’t get more photos, but that is the nature of hard, multi-pitch climbing. We were going “light and fast”, and had to make sacrifices. As a consolation, here are some shots of the awesome cragging routes we did the next day at the Confluence Crag.
I’m glad I was finally able to make my return to Zion, and to hard multi-pitch climbing. I’m psyched to get back into it, and explore some of the possibilities in Colorado!
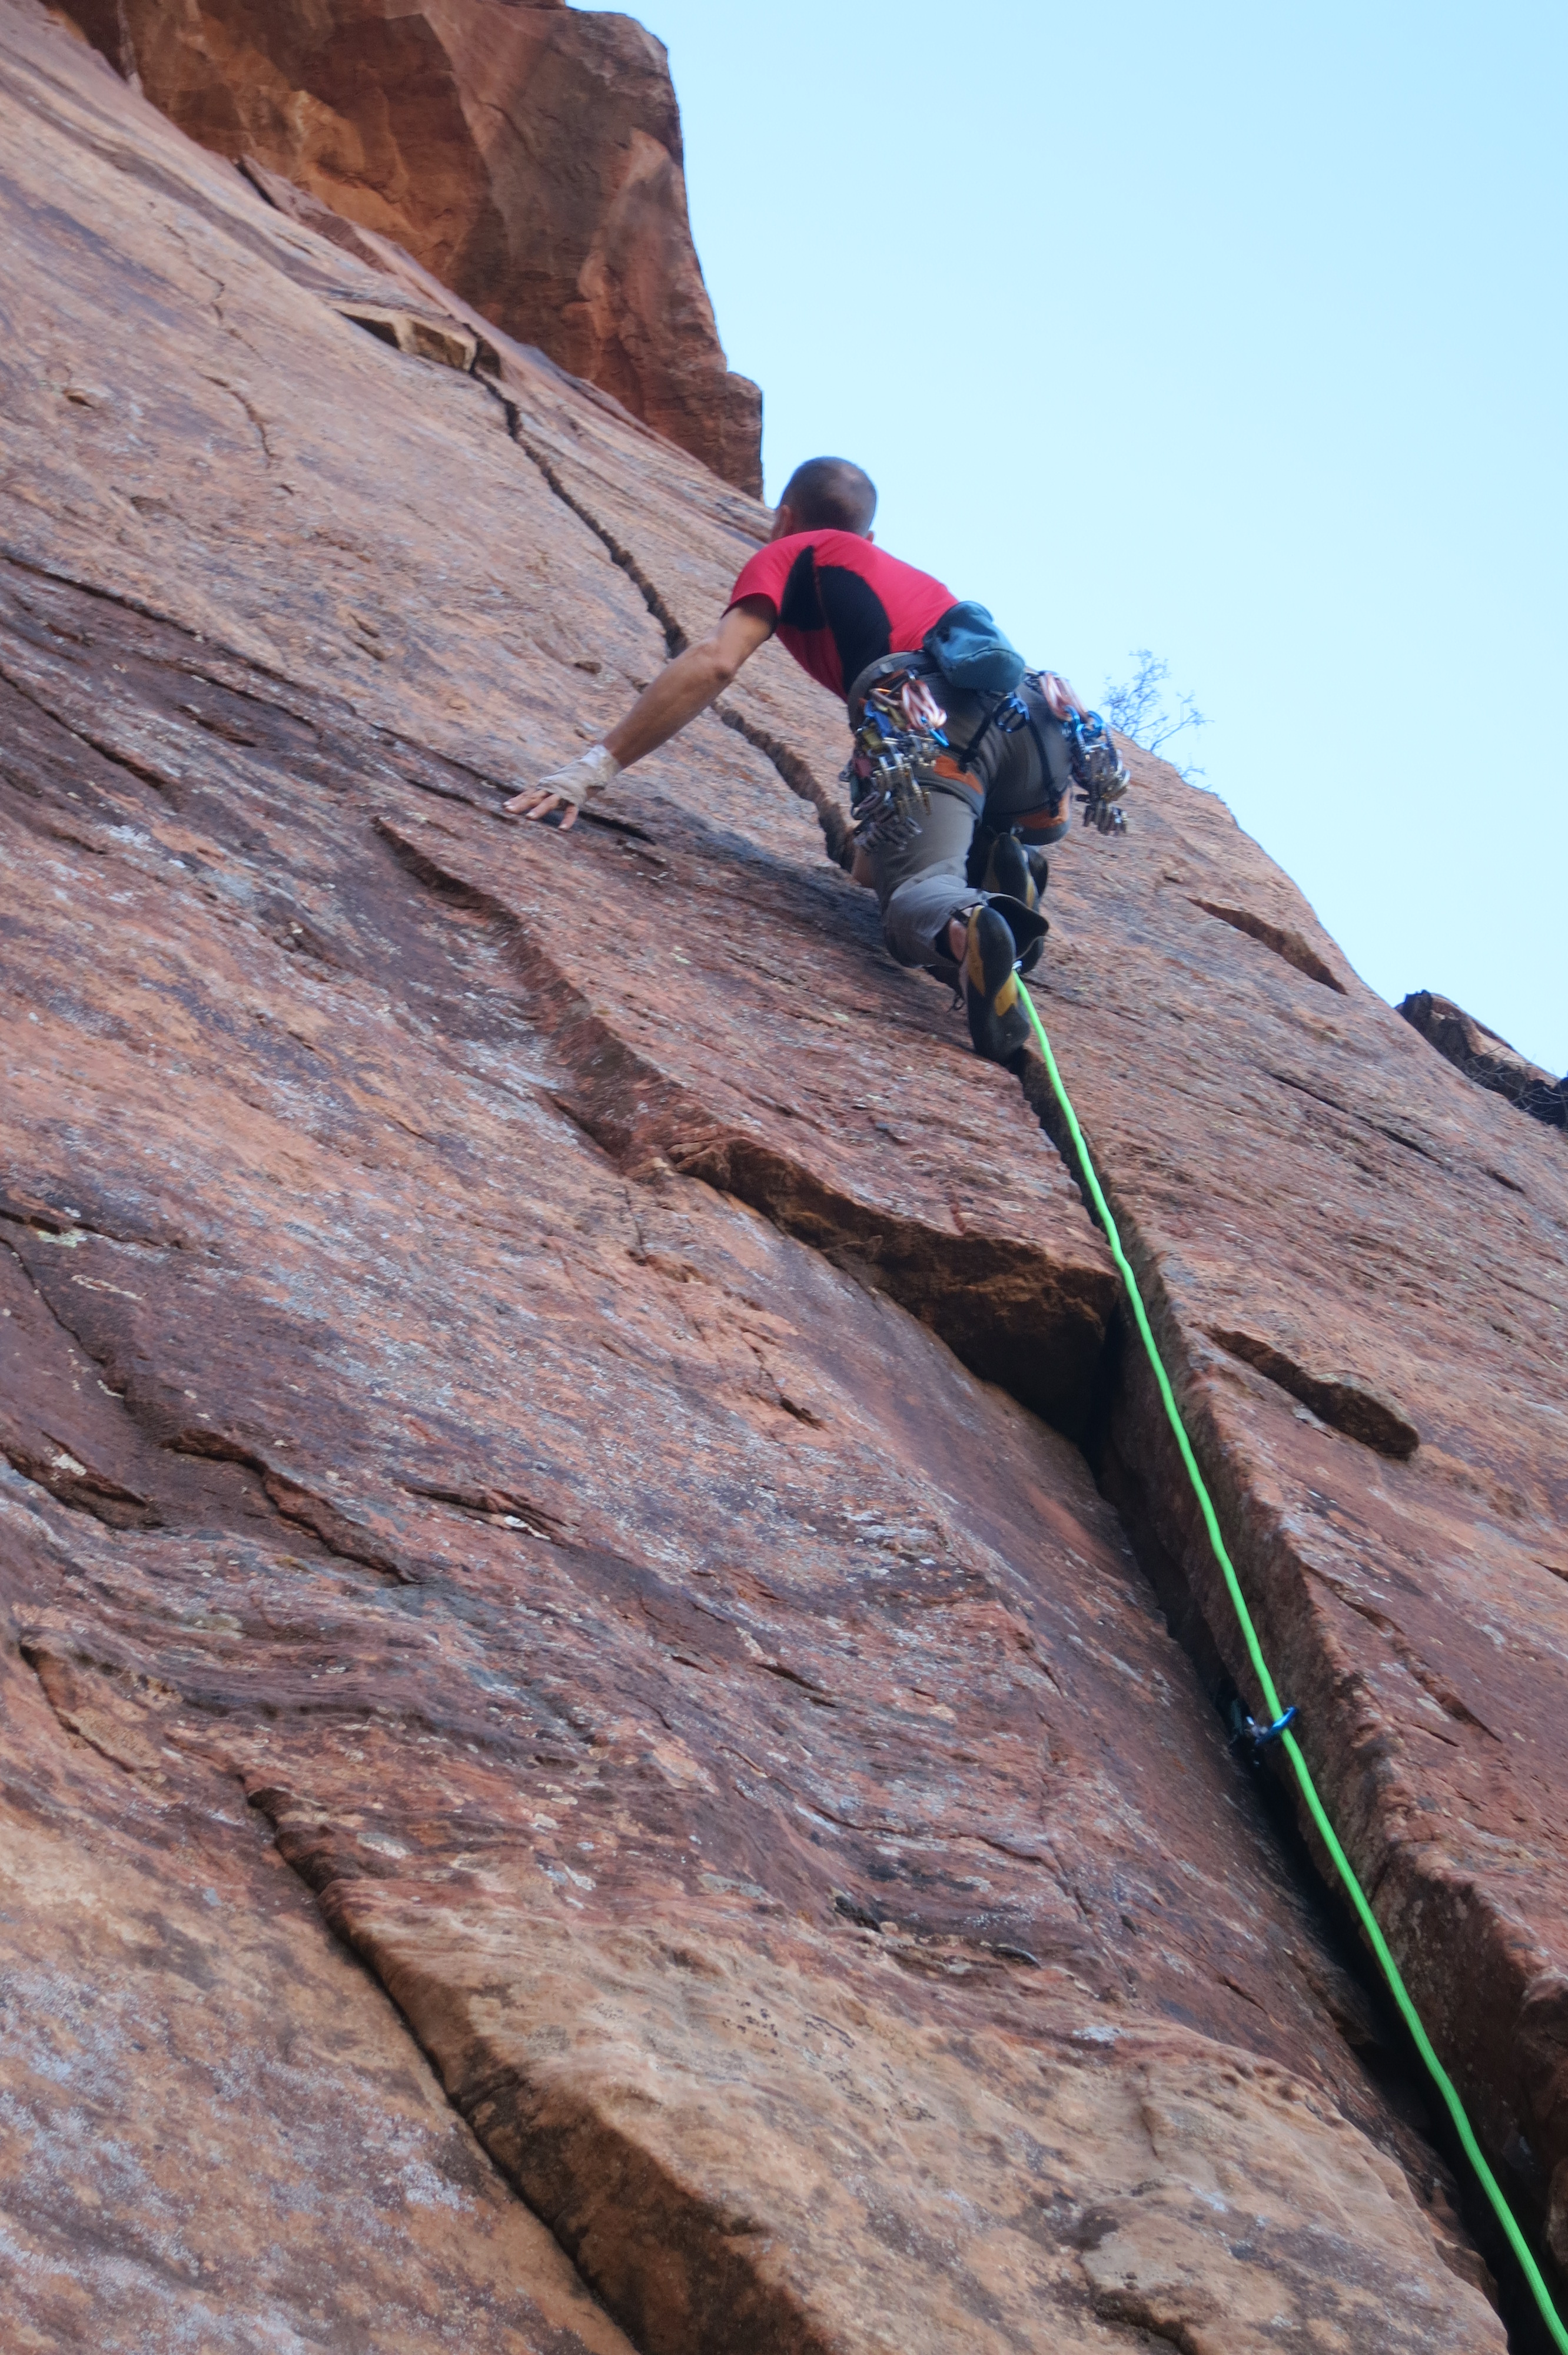
The “Larson/Farr”, an amazing 5.11- splitter hand crack.
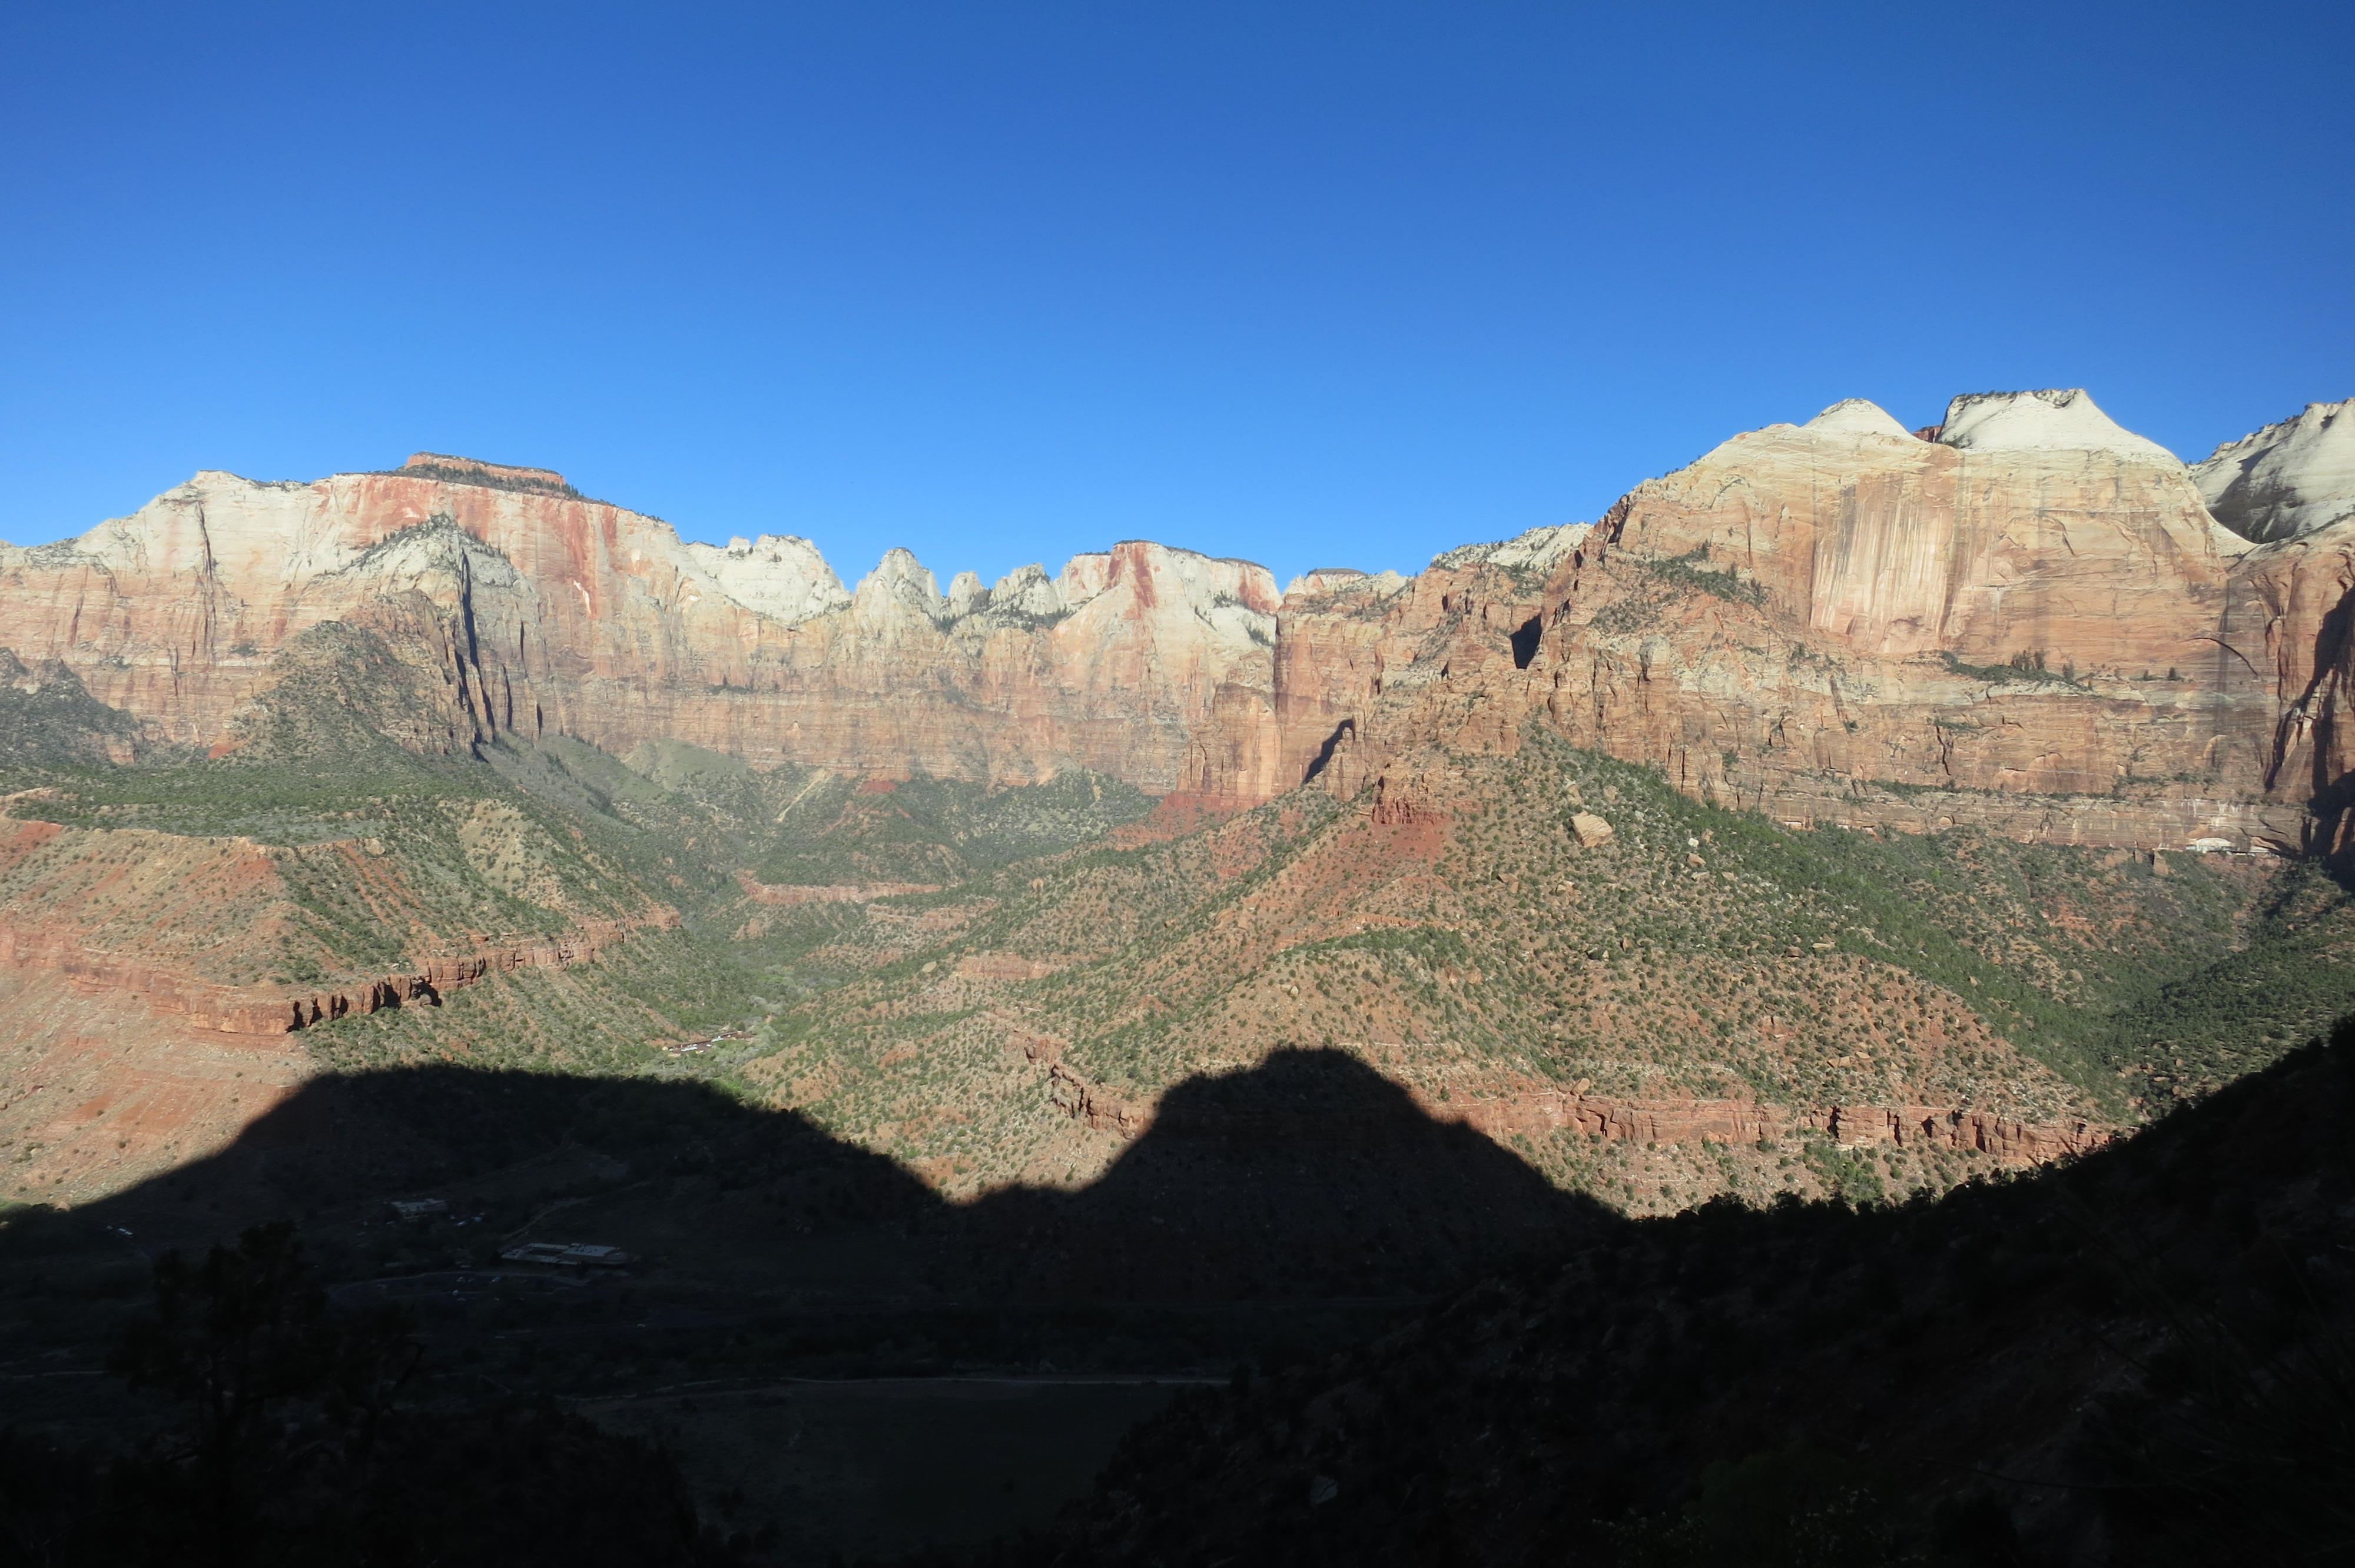
View of the West Temple, Alter of Sacrifice and Streaked Wall from the Confluence Crag.

“Crimson King” 5.11, at Confluence. This was another really awesome route. Nice fingers with variety and good feet (so the jams aren’t so painful). Photo from Mountain Project.
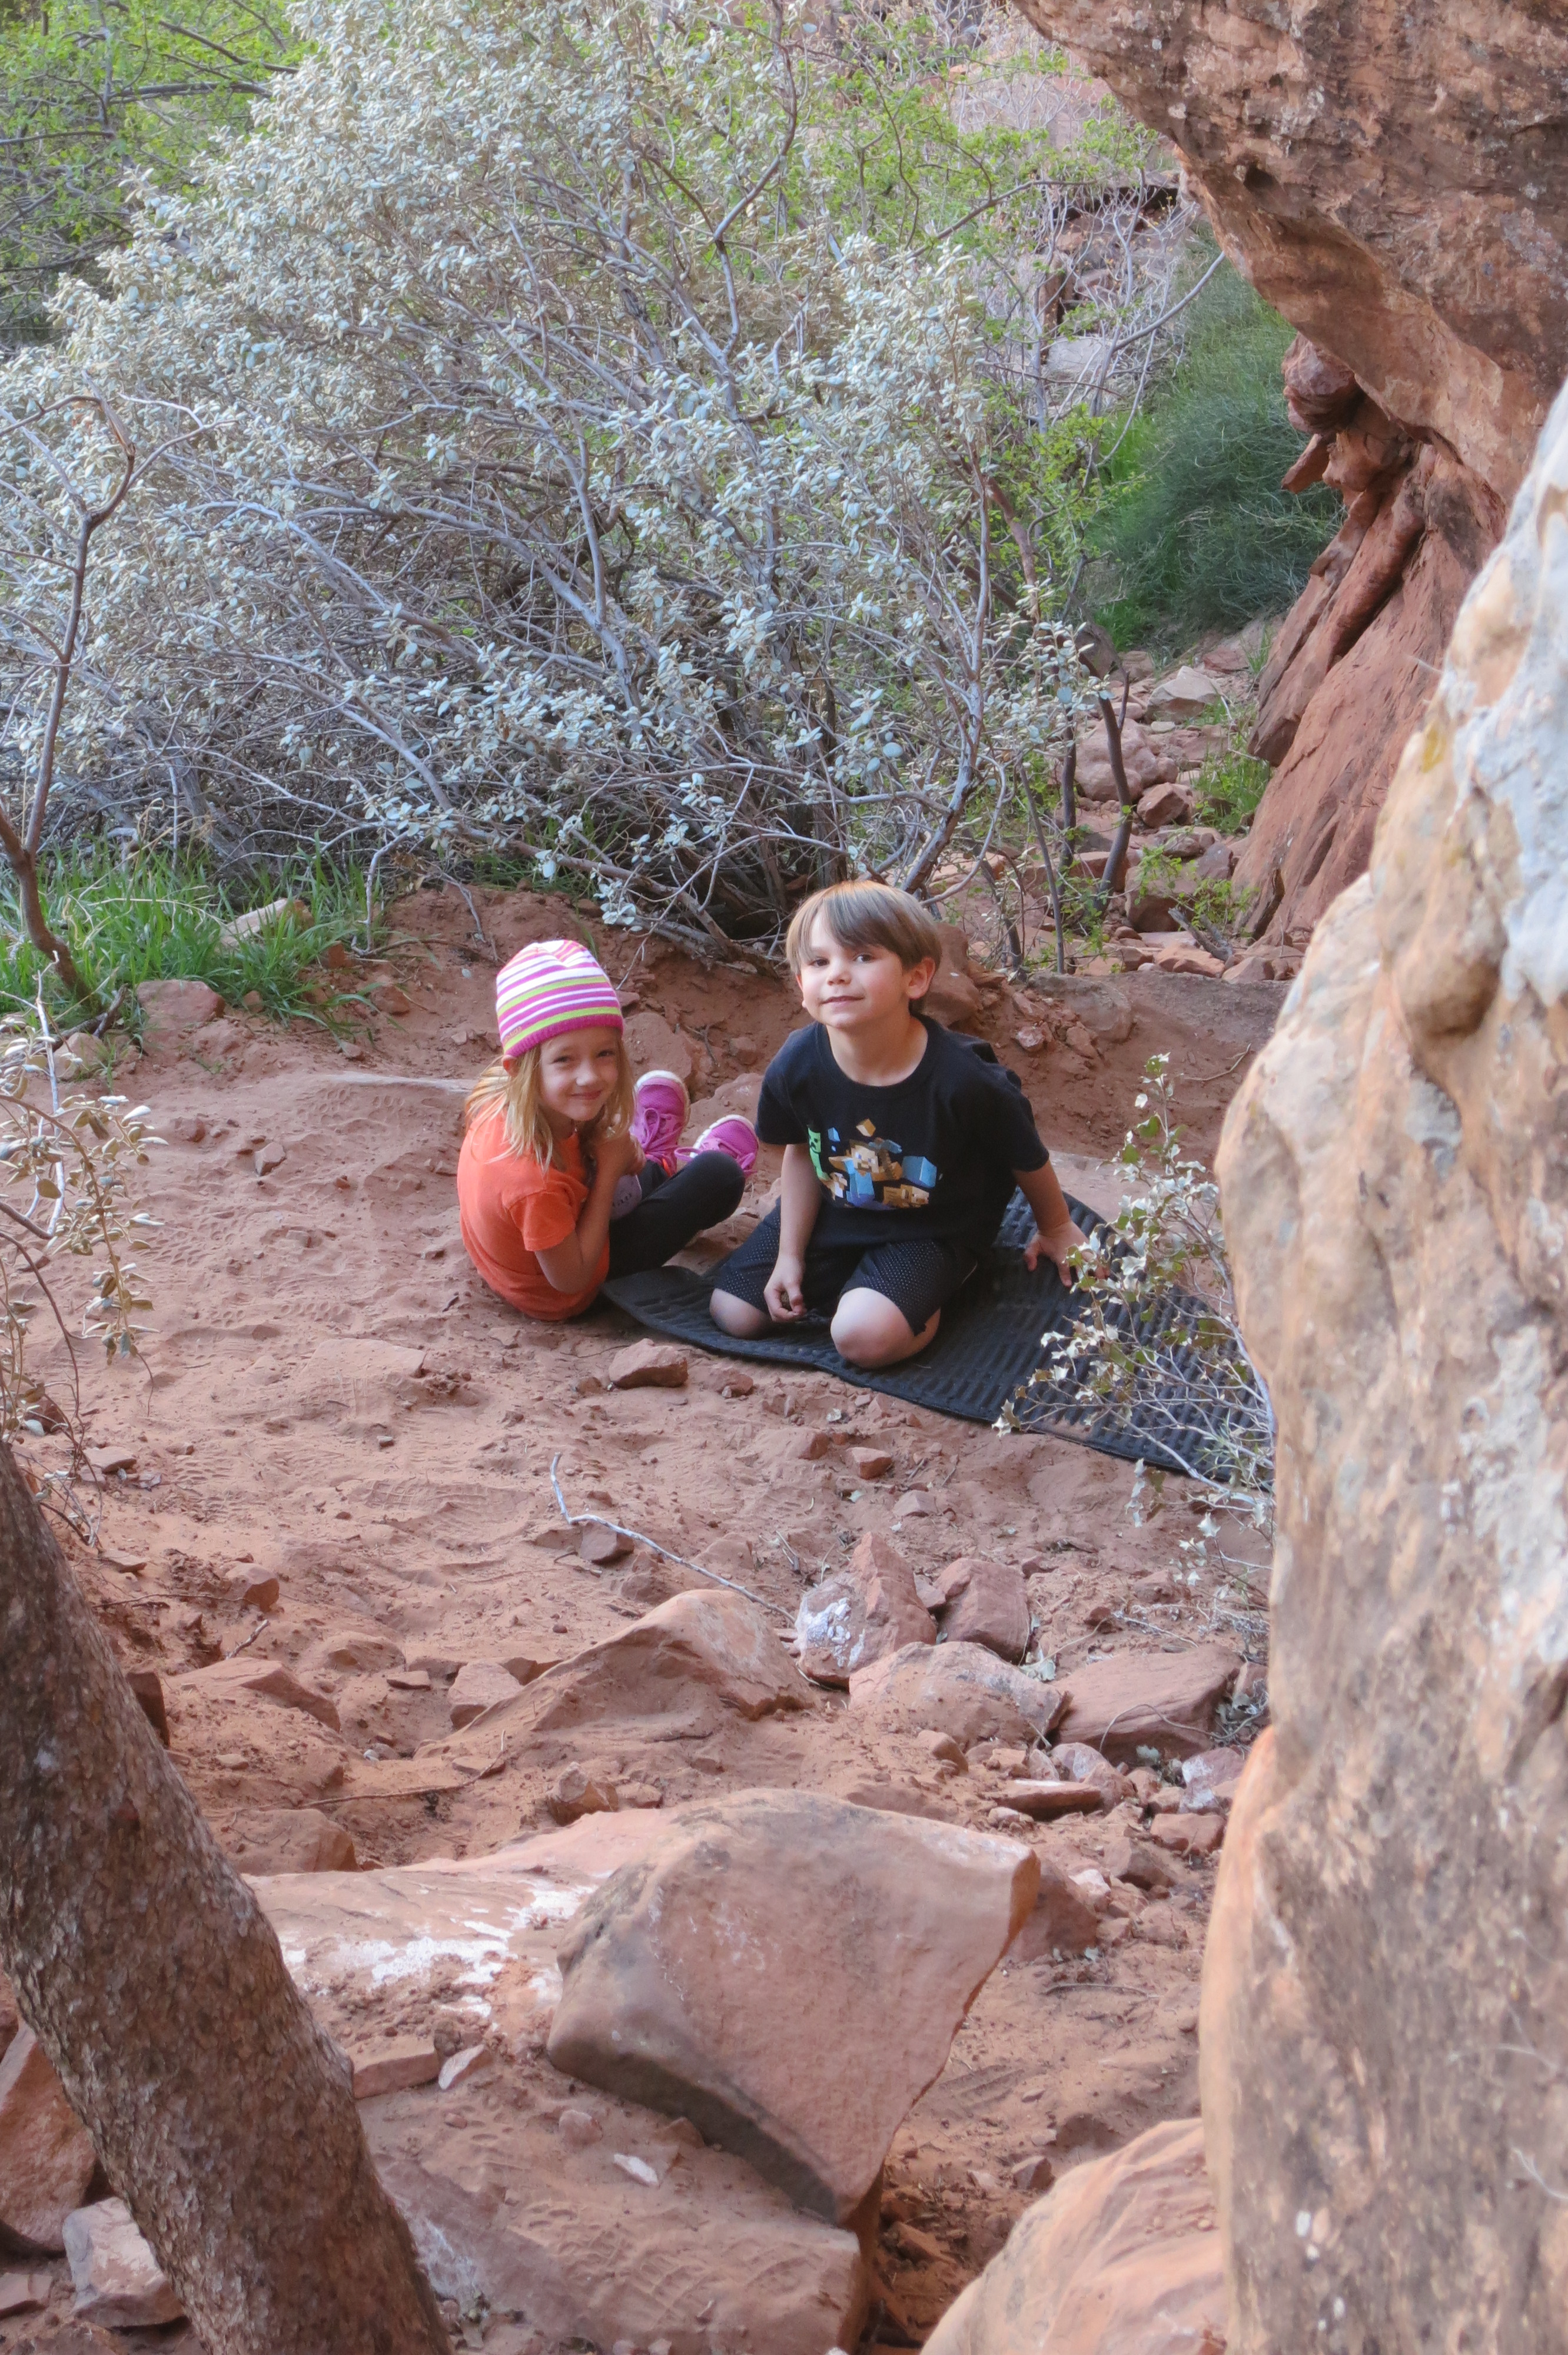
Axel and Lillian becoming great friends in the “Kung Fu Theater”.

Inner Chi – an amazing 5.11 that Brian established years ago. Who knew Zion had climbing like this? Brian did!

Janelle starting up the OUTSTANDING route, Inner Chi ~ at the Kung Fu Theater crag.
Japanamation (5.10) – another great Bryan Bird route at the Kung Fu Theater. Inner Chi is to the right.

man, that was some good reading – i went through half a block of chalk just reading it! nice work, that is really cool how you were able to apply everything you have learned since then to make it happen.
LikeLike