Hello, this is Janelle…Mike’s wife. Since someone is off to Germany enjoying his 12 hour long flight, I thought I would seize the moment and post on his beloved blog without permission. HA!

You know your husband is a little INSANE when he turns the basement into a movie set straight out of the ET!

Keep in mind; the word “insane” is used quite loosely by one very understanding, supportive, kick ass wife! Many things over the past 15 years have been labeled “ insane” a little prematurely and this is no exception.
I digress…
After moving from high, humidity Florida to dry, arid Colorado; we thought we were in the clear for hangboard workouts. We were going to have crisp, dry mountain air and every workout would be just perfect, right?! Well, our basement proved to be a wonderful little humidity hoarder during the monsoon summer experienced here in Colorado Springs. After our first hangboard workouts, it was quickly apparent that we needed to do something about it. It was at this point that Mike revealed to me one of his long-held fantasies (ooh, still some excitement after almost 12 years of marriage)! Apparently, ever since we moved to Dayton, OH back in 2008, Mike has suppressed urges to create a hermetically sealed hangboarding bubble in which climate could be easily and precisely controlled. Well, apparently, Colorado’s humid air was the “last straw,” and Mike had snapped. Clearly he had put some thought into this, because once the decision was made, there was no pause for planning or analysis, just a fury of activity.
Had the man lost his mind???

A view of the The Bubble
Mike stopped in at Home Depot and picked up six 8-foot 1×2’s, plastic sheeting, and one heck of a cool zipper kit (both available in the paint department). You will also need duct tape and a staple gun with staples (if you’re following along at home).

These are awesome and very easy to install. We may use the other one to make a two zipper door.

Lots of plastic!
The general plan was to block off a section of the basement and fully encase it in plastic. Here are a few things required for this whole operation to work: The bubble needs to include a window so you can run A/C.
– Needs electricity
– Large enough for the HB equipment
– Needs to be more-or less sealed
Had the man lost his mind???
I reluctantly offered up some assistance which was not turned down. We lined the ceiling with plastic first because of the open floor joists (which would have let air in) then draped walls of plastic to corner off the new hangboard bubble.

We used plastic to cover these ceiling joists to prevent air from escaping.
With an unfinished basement, the bubble went up quickly. We used staples to tack up the plastic and then reinforced and locked the seams with duct tape. We did have to use some 2X4’s/2×6’s on the ground to tuck and hold the plastic on the floor, some 1×2’s to reinforce the ceiling connections (duct tape helped but was not cutting it) and the zipper door was an added bonus.
About half way into this project, I began to realize that this just might work. Maybe my “insane” husband isn’t so crazy and I should help out with a little more enthusiasm. If it did work, my hangboard workouts would definitely benefit too!
Soon, we had the air conditioner blasting to test the bubble theory out. Besides some strong suction everything held into place except for the temperature and humidly which kept dropping — RAPIDLY. We were amazed at how quickly we were able to regulate temperature compared to our old HB room in Florida which was a bedroom approximately 11’ x 11’. Cracking the window eliminated the suction (which Mike surmises comes from a leaky A/C unit) and ta da! We had ourselves a climate controlled hangboarding bubble room! I was pretty impressed.

Looking up at this corner, you can see where we stated hanging the plastic wall after covering the ceiling joists. We used staples, then white duct tape followed by the 1″x2″ wood trim.

Sticker zipper.

Looking down at the floor, these are the 2×4’s used to tuck the bottom of the plastic.
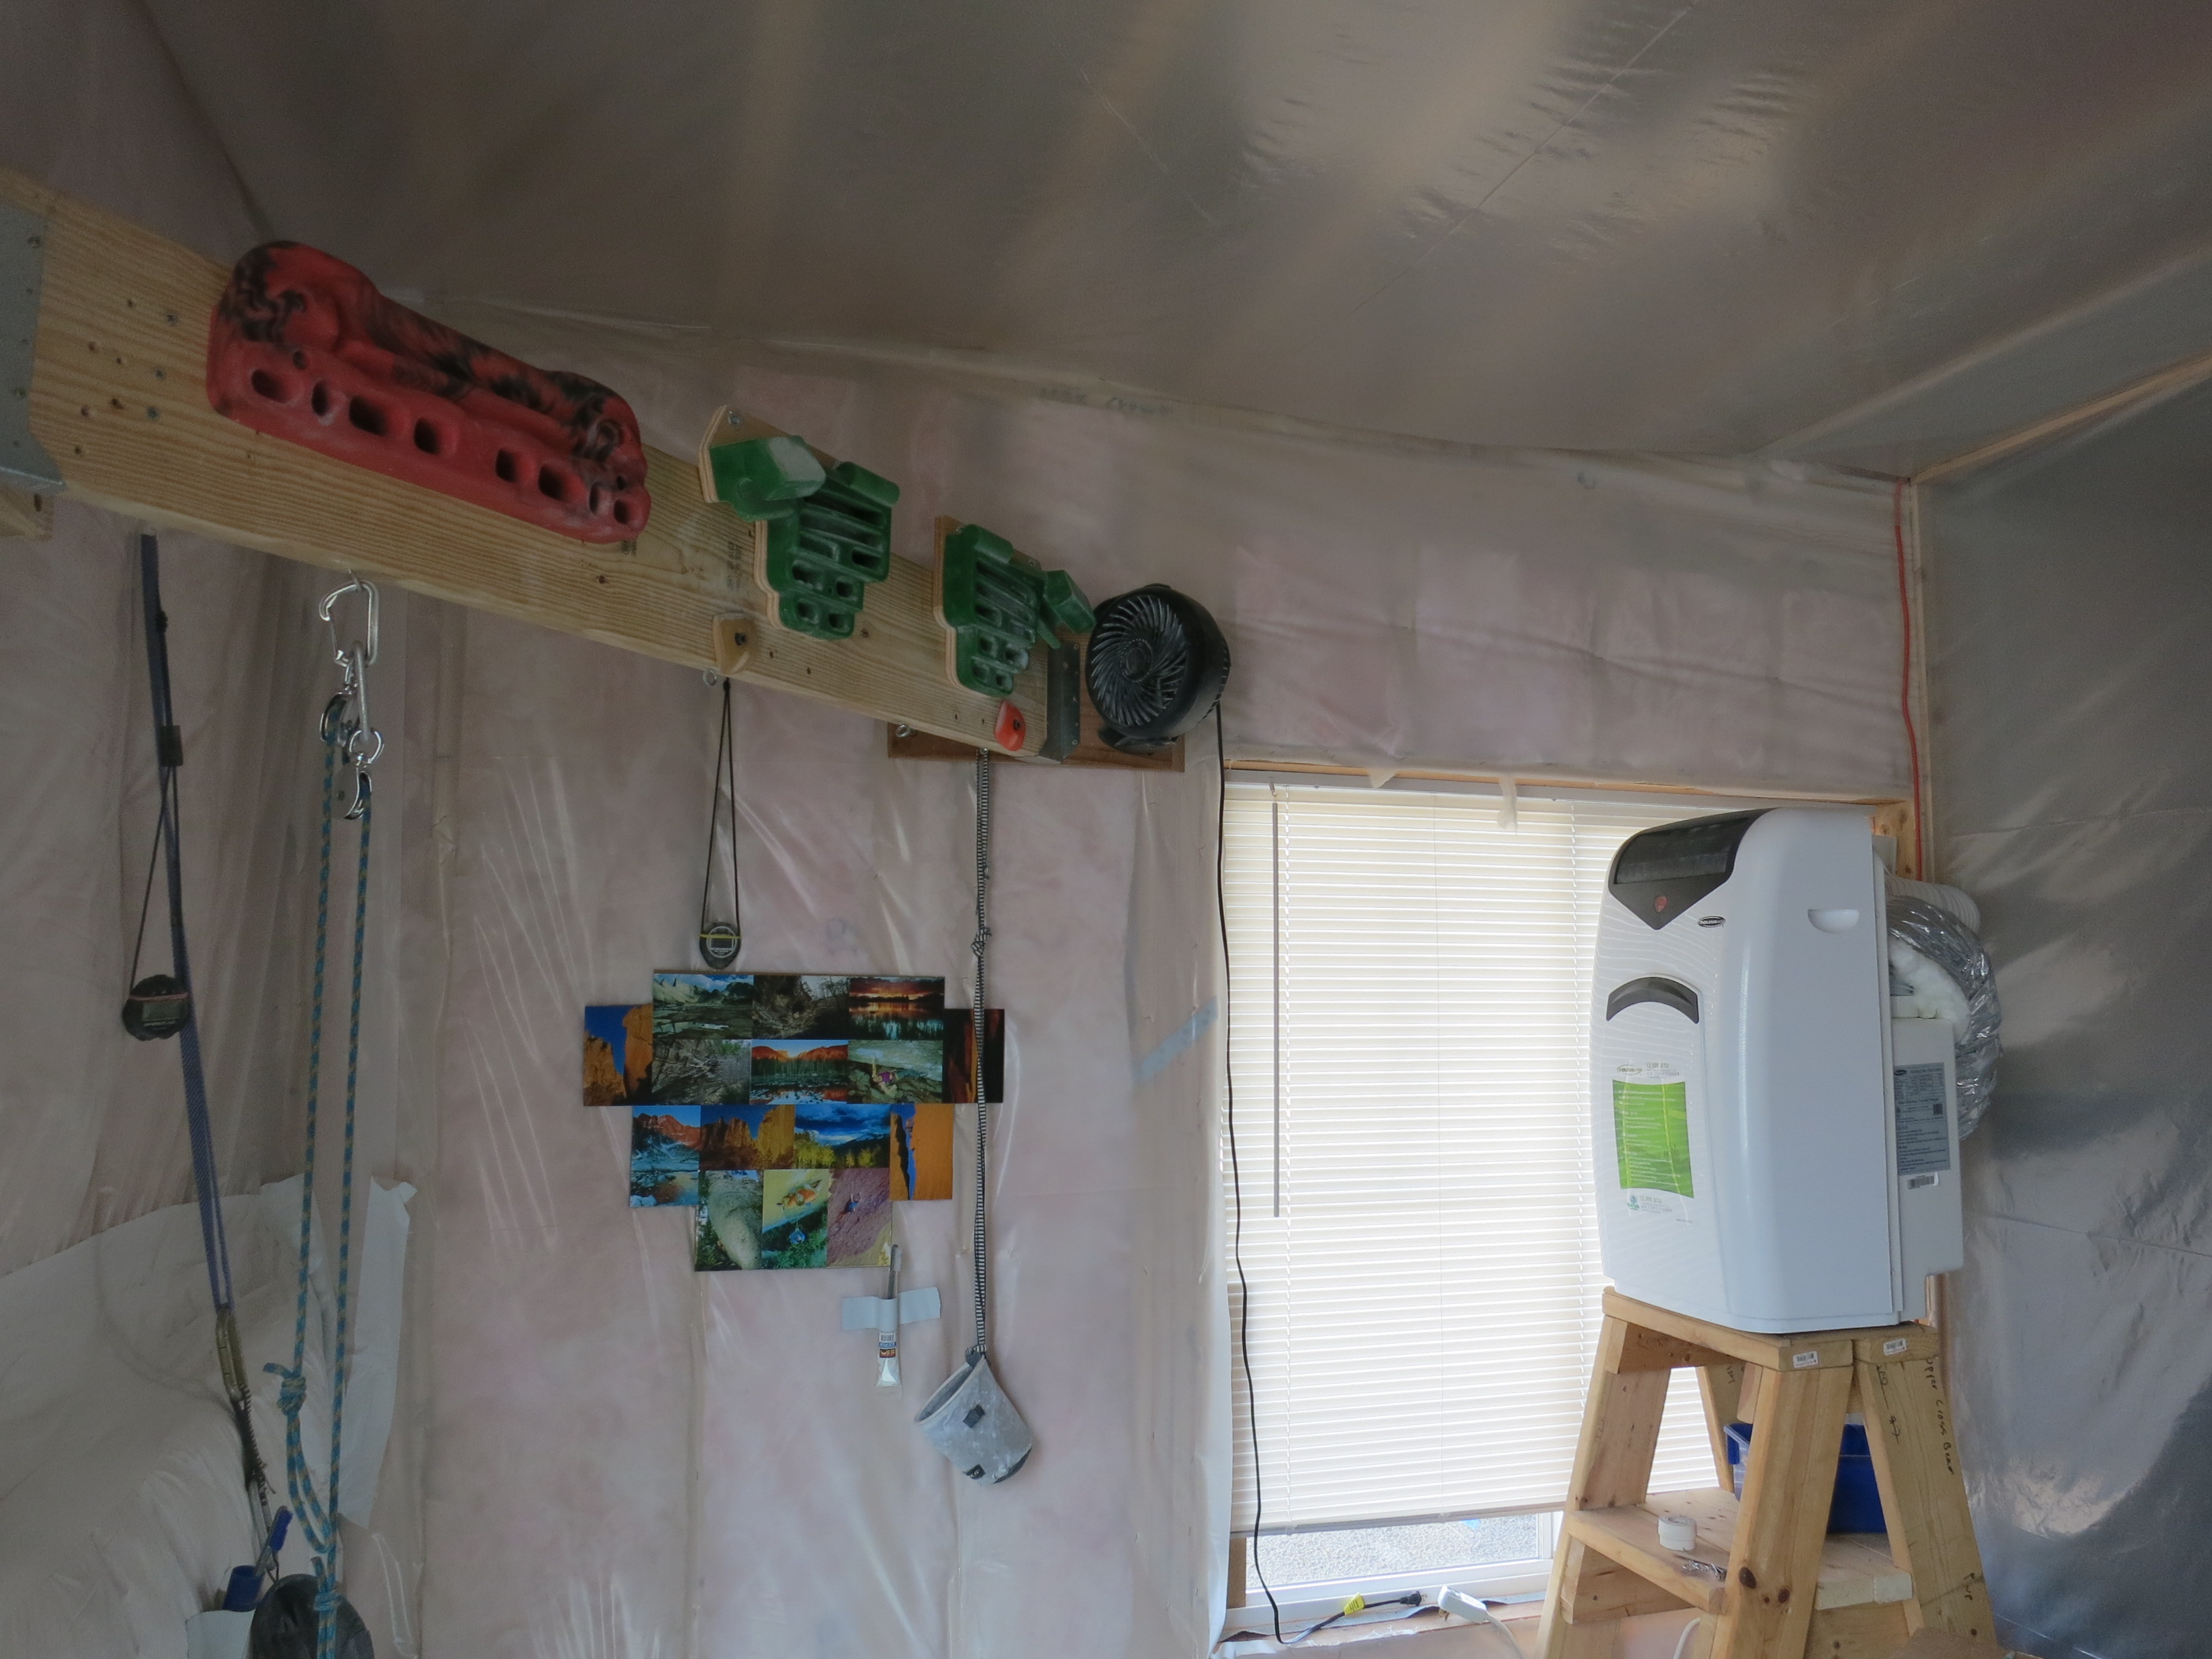
A/C next to window and up on a stand so the cold air blows directly on the hangboard.

Another view from inside The Bubble
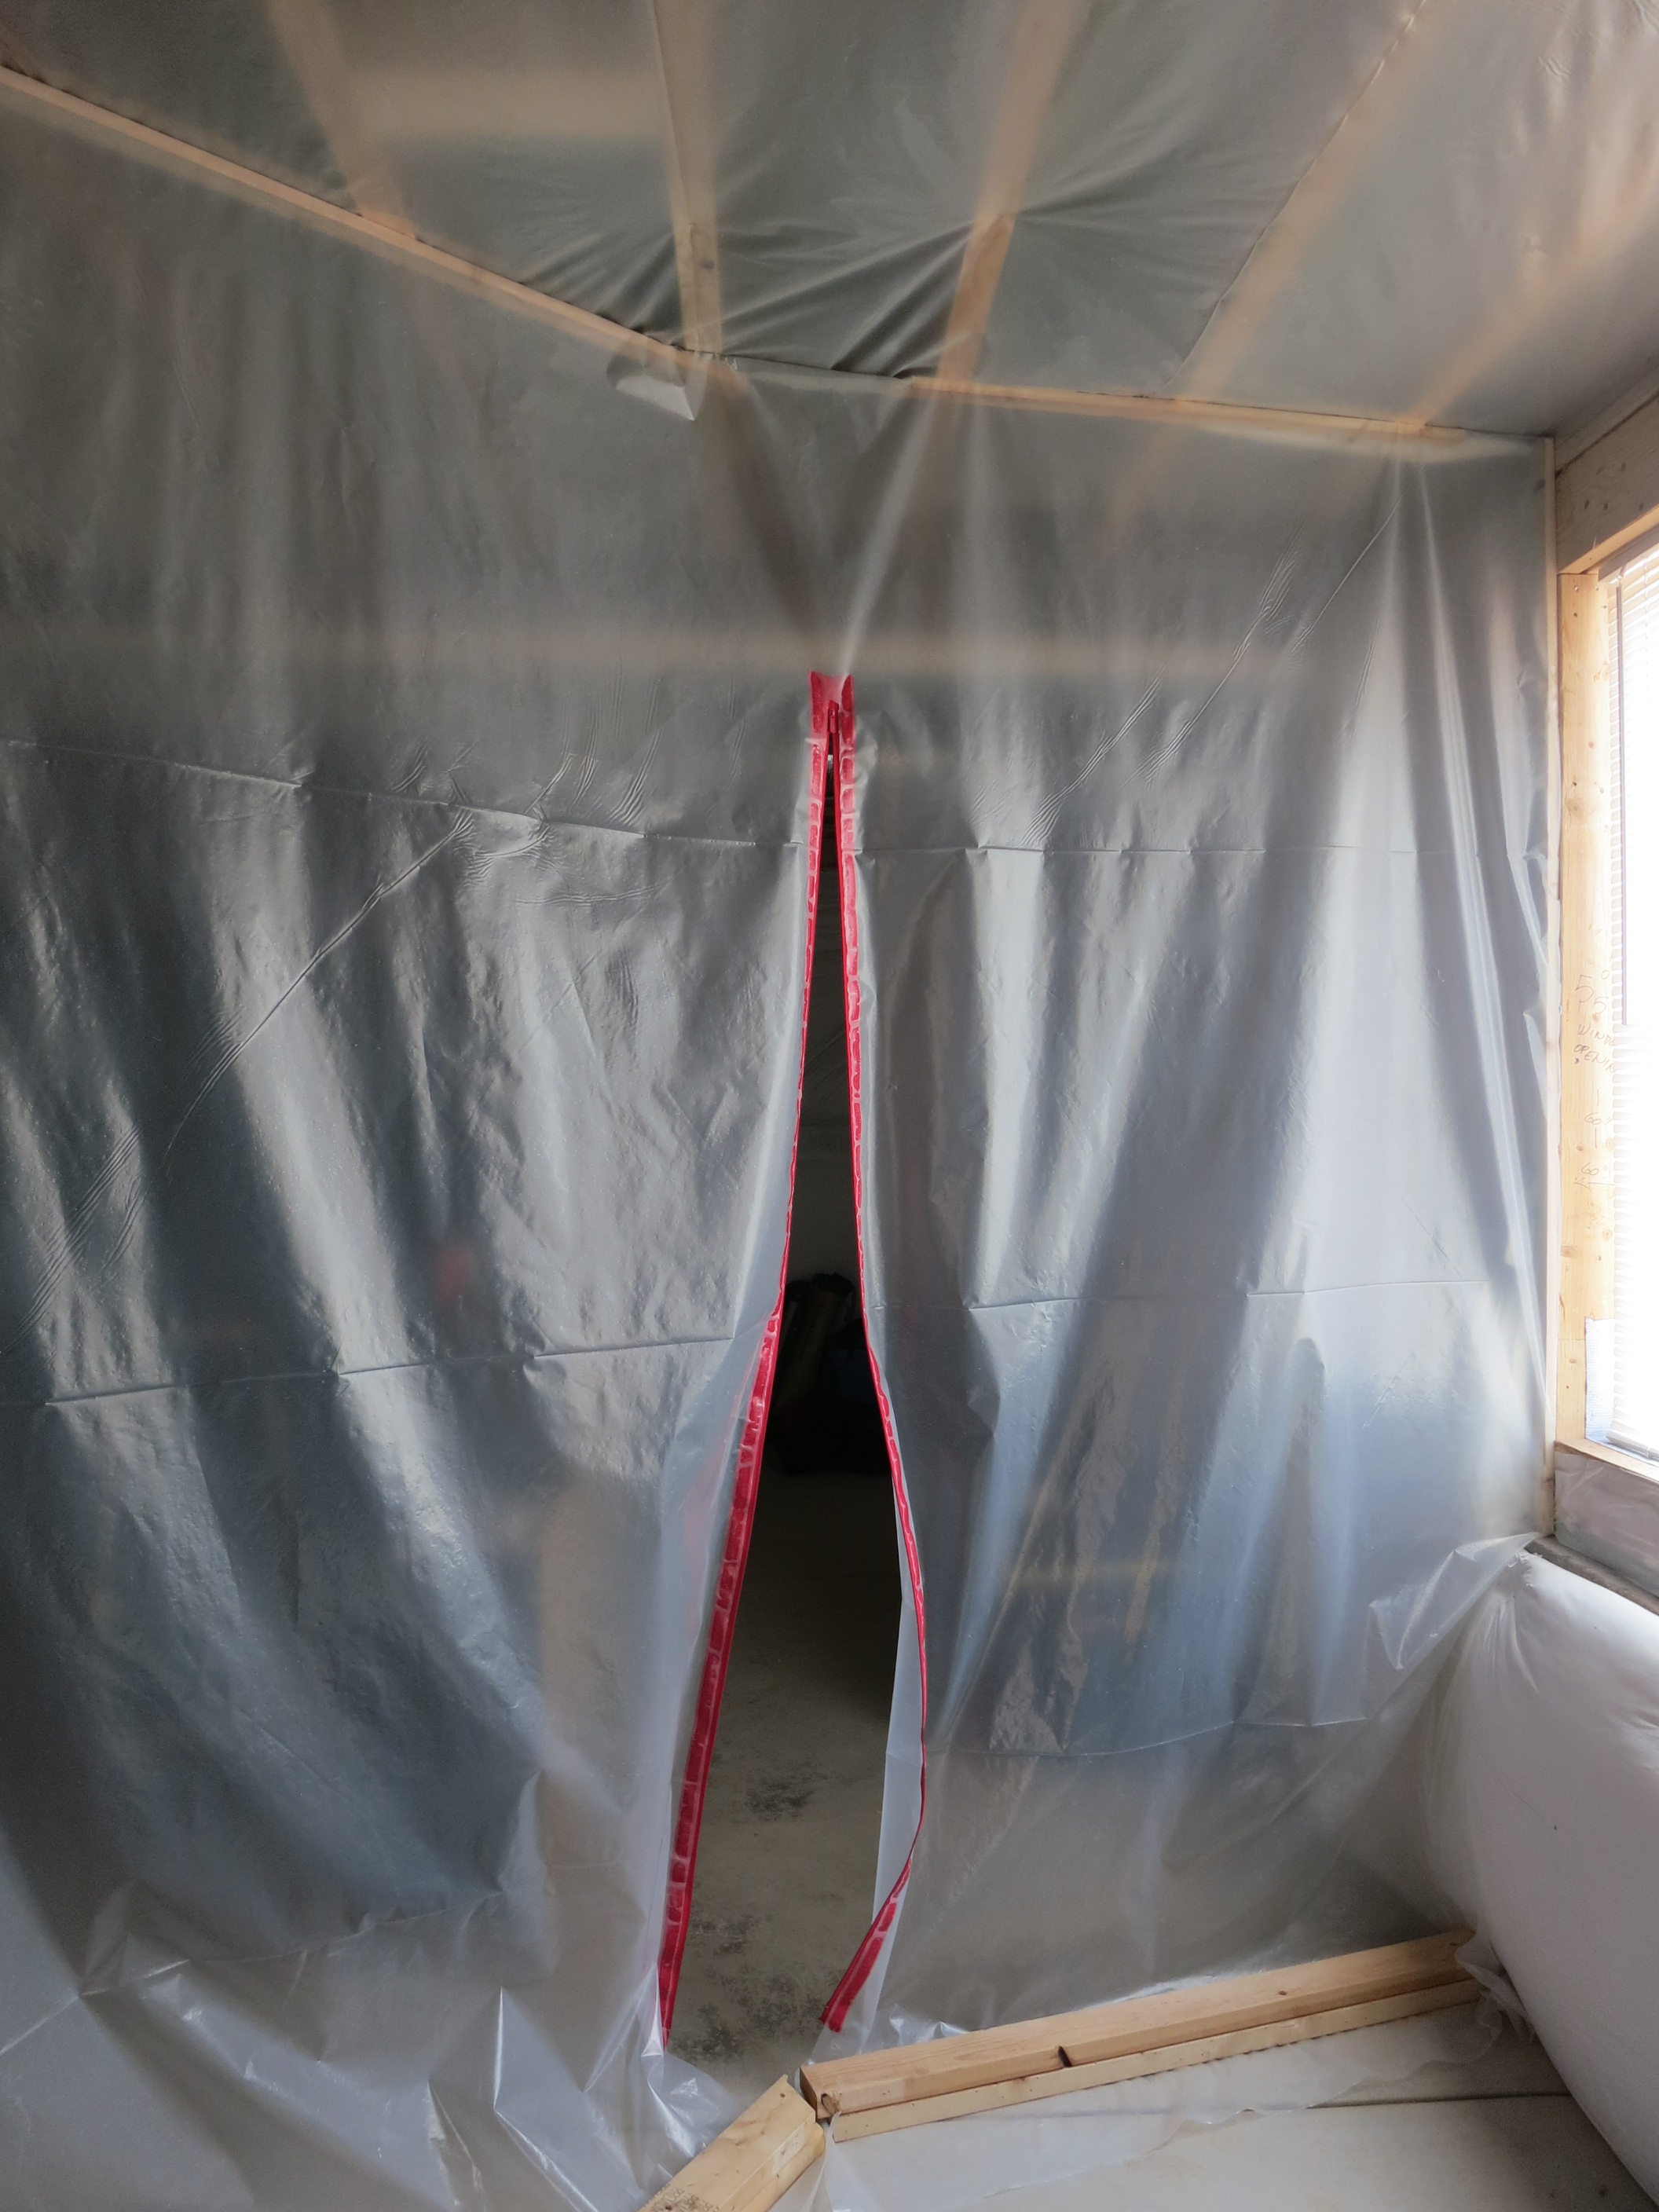
Looking out from inside The Bubble. This is where we might add another zipper.
Yes, Team Anderson came together despite the skeptical wife! I would now like to take this opportunity to introduce myself again as the very understanding, supportive, kick ass wife who recently had the best hangboard phase to date!
The Bubble is awesome.
Not only does it capture that cool dry air, it keeps all the chalk from decorating the rest of the basement/house. I’m a huge fan and would recommend something similar to anyone out there struggling to get good conditions while training. We really should have tried out this insane bubble idea in Ohio and Florida where the humidity really is ridiculous. After reaching new personal bests during my latest hangboard training phase, I’m a believer in The Bubble.
In case you find yourself going a little insane, here is a material list to get you started:
– HDX Clear Plastic Sheeting 10ft X 100ft (1000Sq Ft…way too much for our project so we have plenty for other fun bubble projects)
– Duct Tape
– Staple Gun
– Staples
– One box of Heavy Duty Zipwall Zippers (2 pack)
– 2X4 boards or 2X6, whatever you have lying around
– 1X1/2 boards
– Measuring tape
– Saw?.

Already to go!!!
Happy Hangboarding!

Wow! That is pretty awesome I have to say. I set my hangboard up in my bedroom in my small apartment (with the ac and four fans!) and have been sleeping in chalk for a a month. I’ll be doing the same this winter to keep the chalk storm at bay for sure!
LikeLike
Ha! Nice one.
LikeLike
and will you share the details on how you set up the repositionable hangboard, (it doesn’t look like French cleats)?
LikeLike
Yes, coming soon!
LikeLike
man, that’s awesome. great post janelle! i have been doing my HB workouts on the back deck in the evening, and there have been some tough evenings. even with 2 fans, tite grip lotion, liquid chalk between sets, and chalk dips between reps it is a battle. do you and mike share an RPTC or do you each have one? do you do your workouts concurrently (ie you hang during his rests, vice versa)?
LikeLike
Wow. I think it may be time for an intervention…
LikeLike
Slim, We share our RPTC, but we don’t workout at the same time. I usually workout first, before work, then she works out after I leave.
LikeLike
Have you found an ideal temp and humidity level? I would think the lower the humidity the better, but I’ve found that sometimes a little humidity helps with climbing (of course not too much).
LikeLike
Great question! I wouldn’t say I’ve found an ideal, but I agree that there is such a thing as “too low” for temperature and humidity. I’ve had workouts with humidity in the teens, and that was way too low. I had to blow on my tips to moisten them. For outdoor climbing, I like it to be about 40-45 degrees and 30-50% humidity. However, the overnight conditions play a big role. If it was warm the night before, the rock will be warmer, so you need cooler air temps, and vice versa. Nevertheless, I try to capitalize on every climbing day I get, regardless of the conditions. In the immortal words of Charlie Porter: “If you wait for good weather, you never climb shit.”
LikeLike
Mike/Janelle, did you build your bubble primarily to make training more pleasant, ensure more consistent and accurate results, or both? I’m considering building one to reduce the variables (temp and humidity) that could affect my hangboard data. At least, that’s the excuse I’m using…
LikeLike
Chris, both of those play into it, but primarily, you need consistent conditions to get consistent training. You can use air conditioners and get decent conditions in any room, but if you “bubble” it off, you have less air you have to cool, so it’s saves energy and time. Good luck!
LikeLike
Thanks Mike! I’ll post a picture on the forum if/when I get it up and running.
LikeLike
Mike/Janelle, photos are up on the forum. Did you go out of your way to seal up every little crack and crevice in the room? If so, did it help with the cooling?
LikeLike
Mike/Janelle, photos are up on the forum. Did you go out of your way to seal up every little crack and crevice in the room? If so, did it help with the cooling?
LikeLike